Our Story So Far
Our hero, then-Captain Smyth, in command of the fictitious 1st battalion/250th Regiment, and his faithful Lieutenant Royce shipped out of Boston—the starting zone on the campaign map—and headed south toward New York. They performed so well that a unit of Loyalist Militia joined them, adding another 60 men to their ranks.
The Loyalists have now been uniformed in green and been given some rudimentary training. They are still considered milita but their Training Level has raised been raised from D to C. The 250th Regiment (fictitious) then joined the British army while they reformed in Nova Scotia during 1776.
This is the second battle in Lt. Colonel Smyth’s solo campaign. Readers who missed the beginning can first read Part 1: The Ambush.
The Scenario
Turn 1 — Disaster on the Road
Turn 2 — Smyth Reorganizes
Turn 3 — The Advance Resumes
Turn 4 — The Fight for the Hill
Turn 5 — Death on the Hill
Turn 6 — The Final Charge
After the Battle
The Scenario
British Objective: Occupy and hold the hill overlooking the crossroads until Clinton’s flanking force arrives.
British Entry: North table edge, entering by the road.
Colonial Deployment: Two Units begin on the hill.
Colonial Reinforcements: Two Units arrive on Turn 3 and the final Unit on Turn 4 by the southern road.
Special Circumstance: Smyth advanced without sending scouts ahead.
If you recall Captain Smyth was promoted after his last battle to Lt. Colonel, Military Rank 4 (MR4) in Light Bobs terms. This raised the strength of his Regiment to 400 men plus the 60 Loyalists that joined him. Lt. Colonel Smyth and his Regiment have now sailed to Long Island NY and are preparing to engage the Rebels with their German Allies in what will later be known as The Battle of Long Island.
The Mission
Lt. Colonel Smyth has been given orders to march through a small possibly unguarded pass a little east of Bedford onto the Jamaica Road. He is to march to west to the first crossroad and occupy the hill nearby and hold it and the crossroad until General Clinton’s flanking force arrives to relieve him.
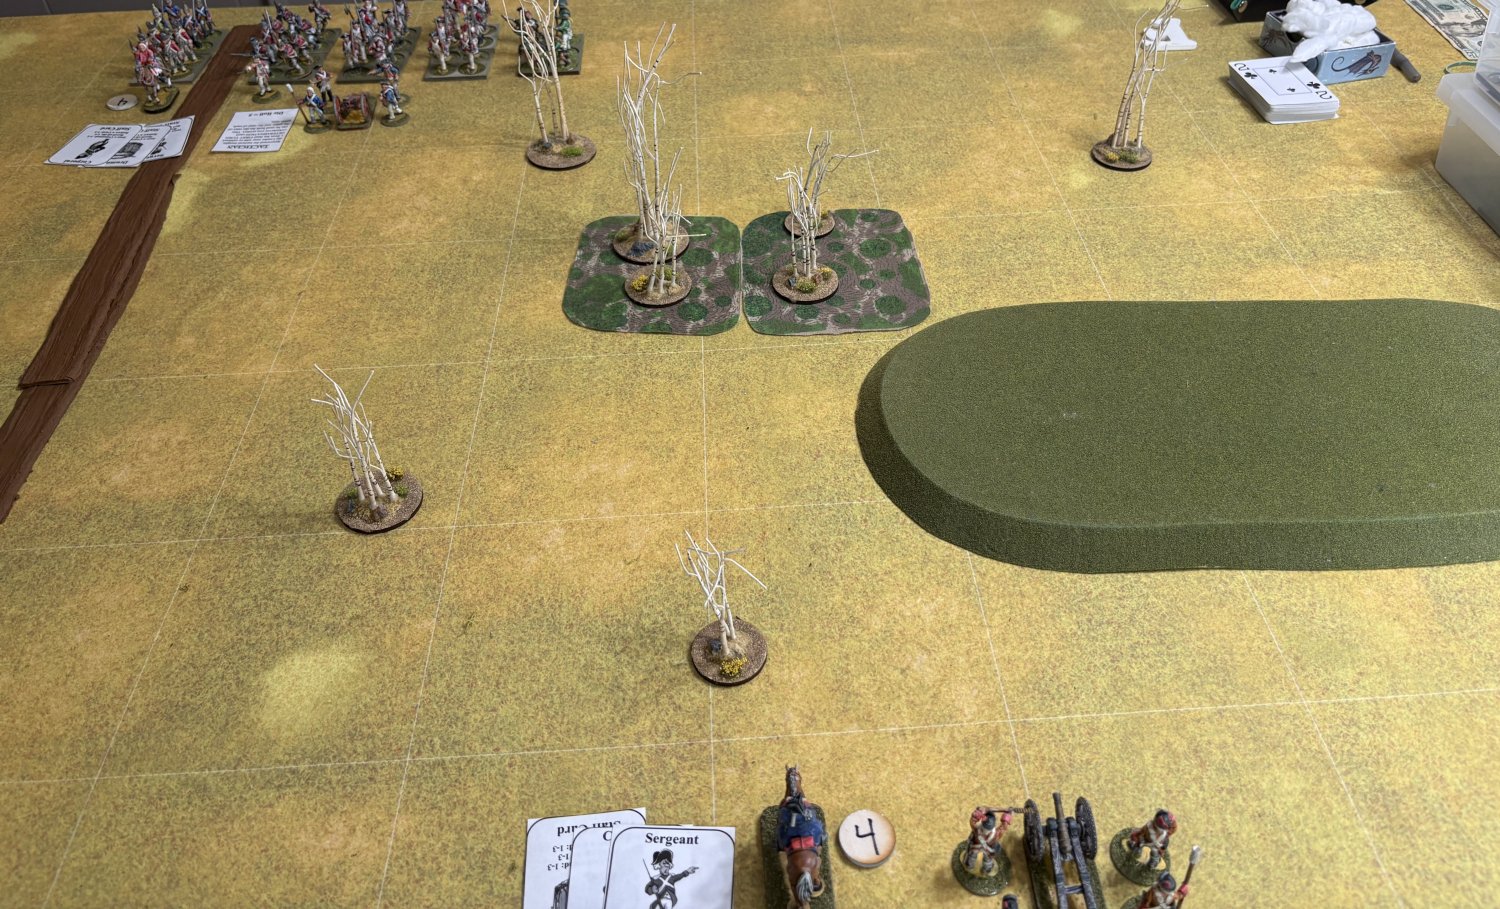
The British arrive on the North table edge on the road. They are to march on as fast as they can. The British are not required to occupy the crossroads itself. Their objective is to seize and hold the hill that overlooks it.
Smyth has marched so fast that he did not send out any scouts. He did lead his column with his Light Infantry.
The British Regiment

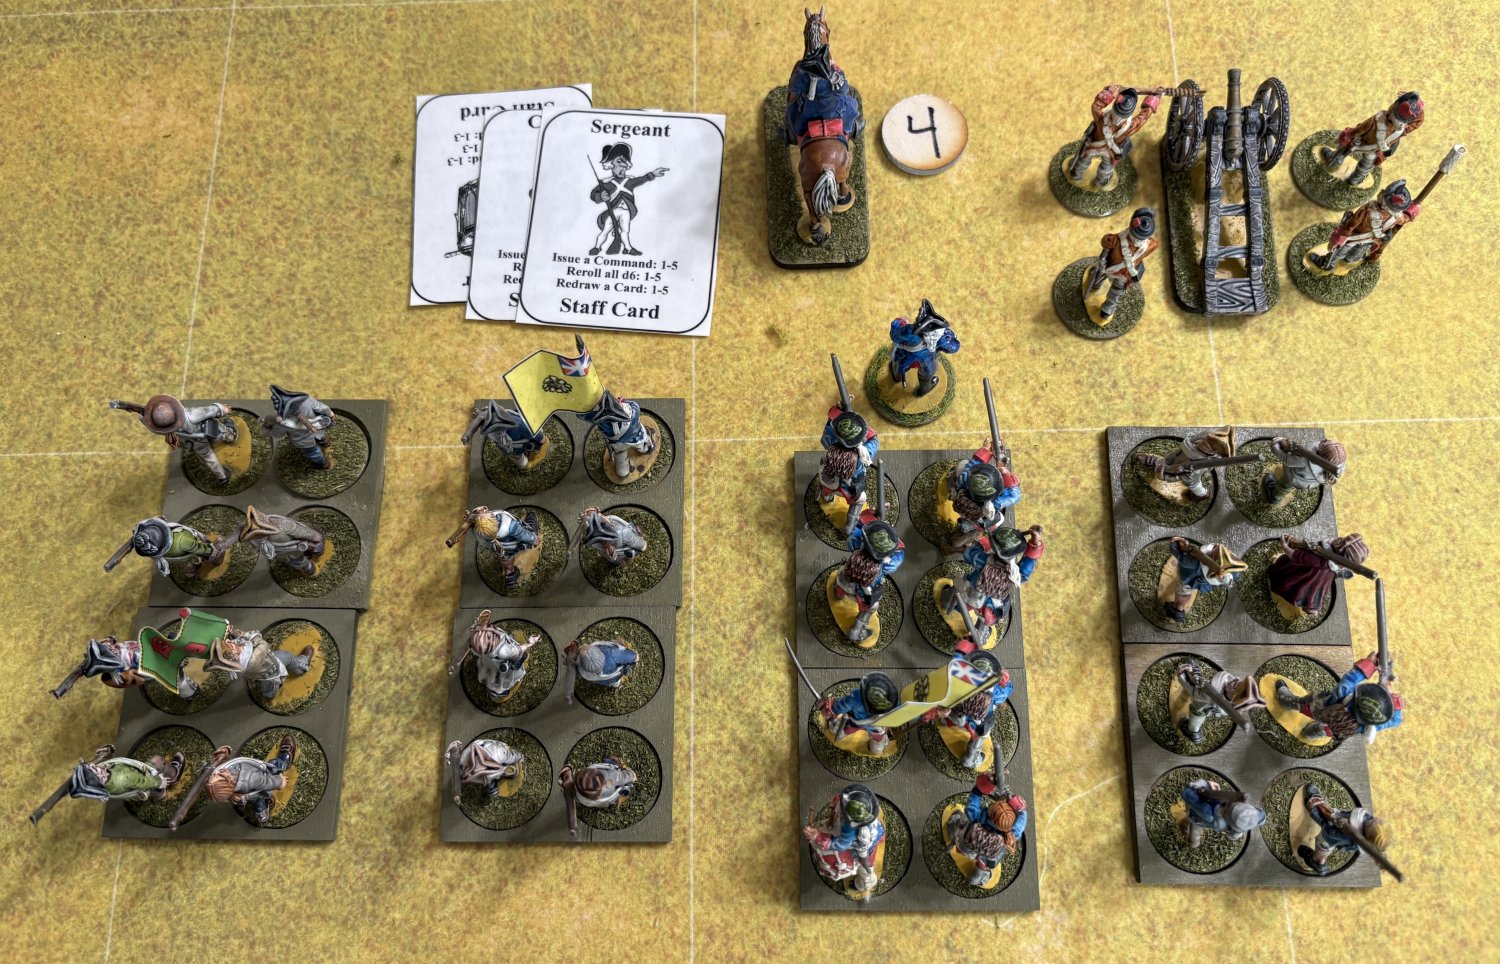
In this image you see the 6 Units that make up LT. Colonel Smyth’s Regiment. He has attached Lieutenant Royce to the Light Infantry. As a Lt. Colonel he is allowed 2 Lieutenants but his second one has not arrived yet from England.
His force consists of one Grenadier Unit, one Light Infantry Unit, two Line Infantry Units, one 3-pounder gun, and one Loyalist Militia Unit.
The Colonial Defenders
The Colonial force is commanded by a MR 4 Leader whose name has been lost to time. His Regiment consists of 8 Regulars (B), 8 Militia with Rifles (D), 16 Militia (D) and a 3lb gun (C). Training is shown as (Training Level).
Turn 1 — Disaster on the Road
The British have first move in this scenario. Note that at the start of every new game both sides roll for their Command Cards at the beginning of the first turn.
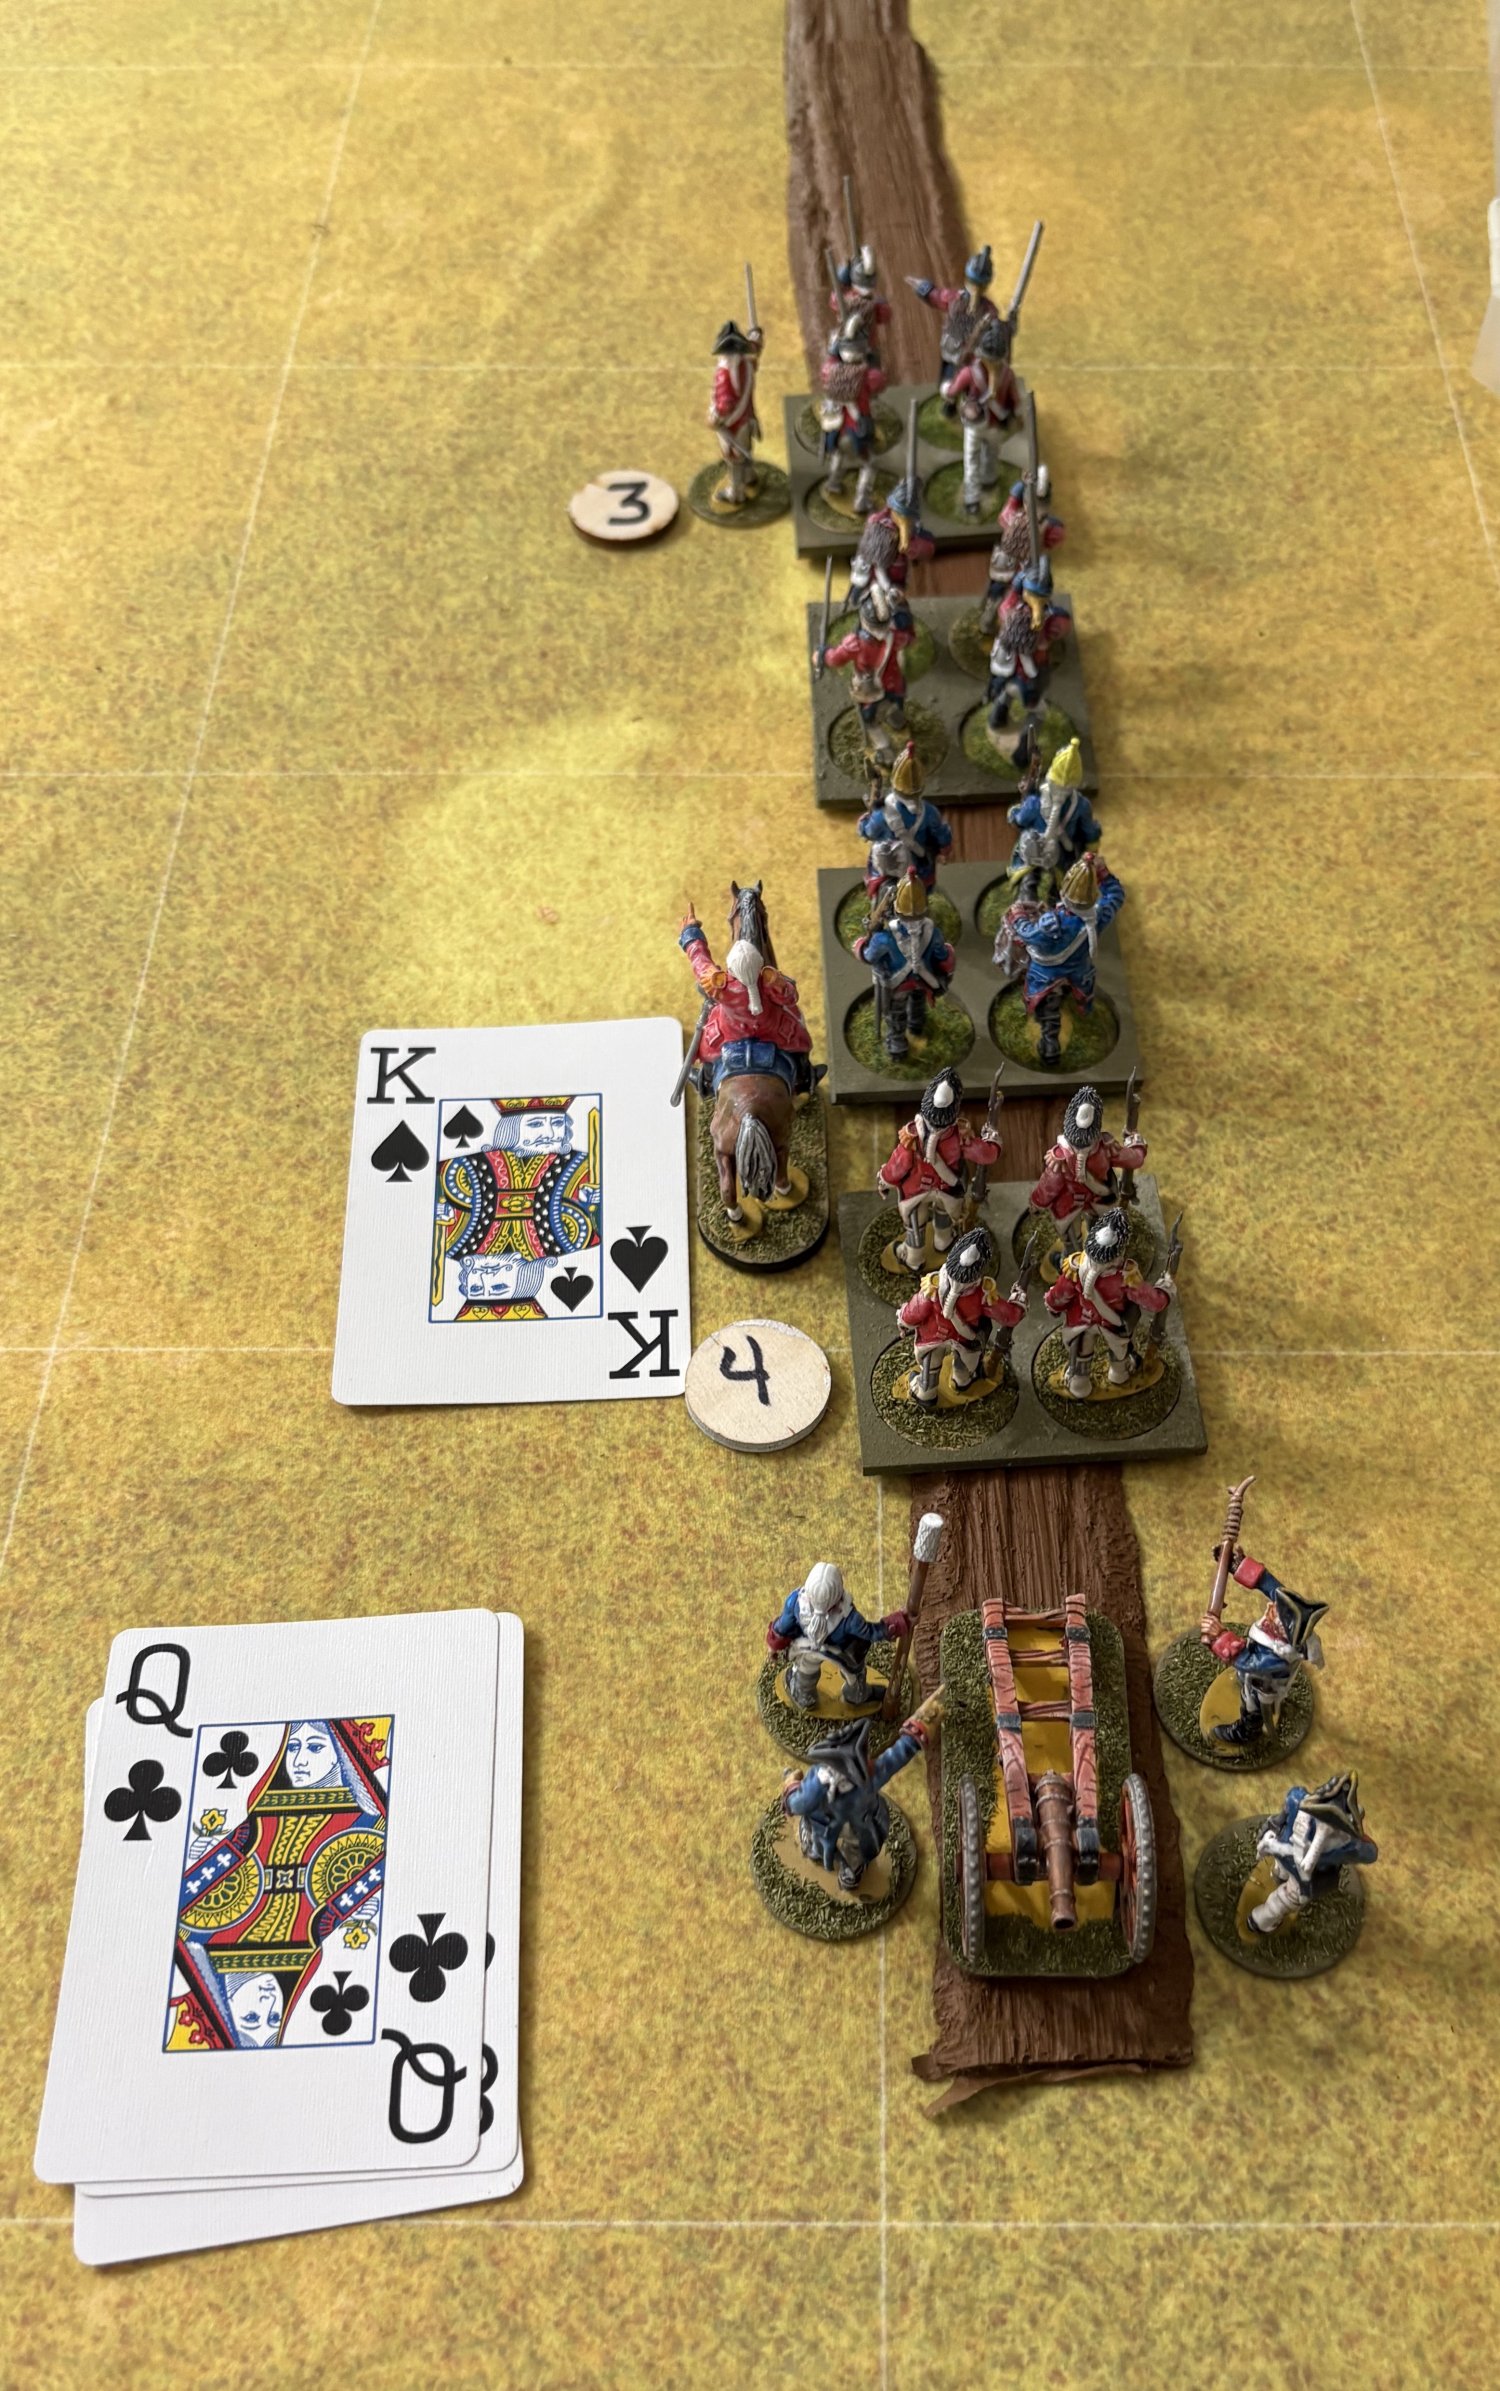
LT. Colonel Smyth enters the table on the road in column formation. He plays a King (2 Commands) on the entire column. Units moving in Column only need a Command card played on the lead unit. All the rest will follow at no extra Command cost.
Note: 2 Units are off the table in column and will enter as they arrive.
The second action of the King card allows the Lights to break off to the left and head for the woods at the base of the hill. The rest of the column advance one more move along the road. As this is the second action for all the Units they all add a red disk which marks a Disorder (DIS) on each.
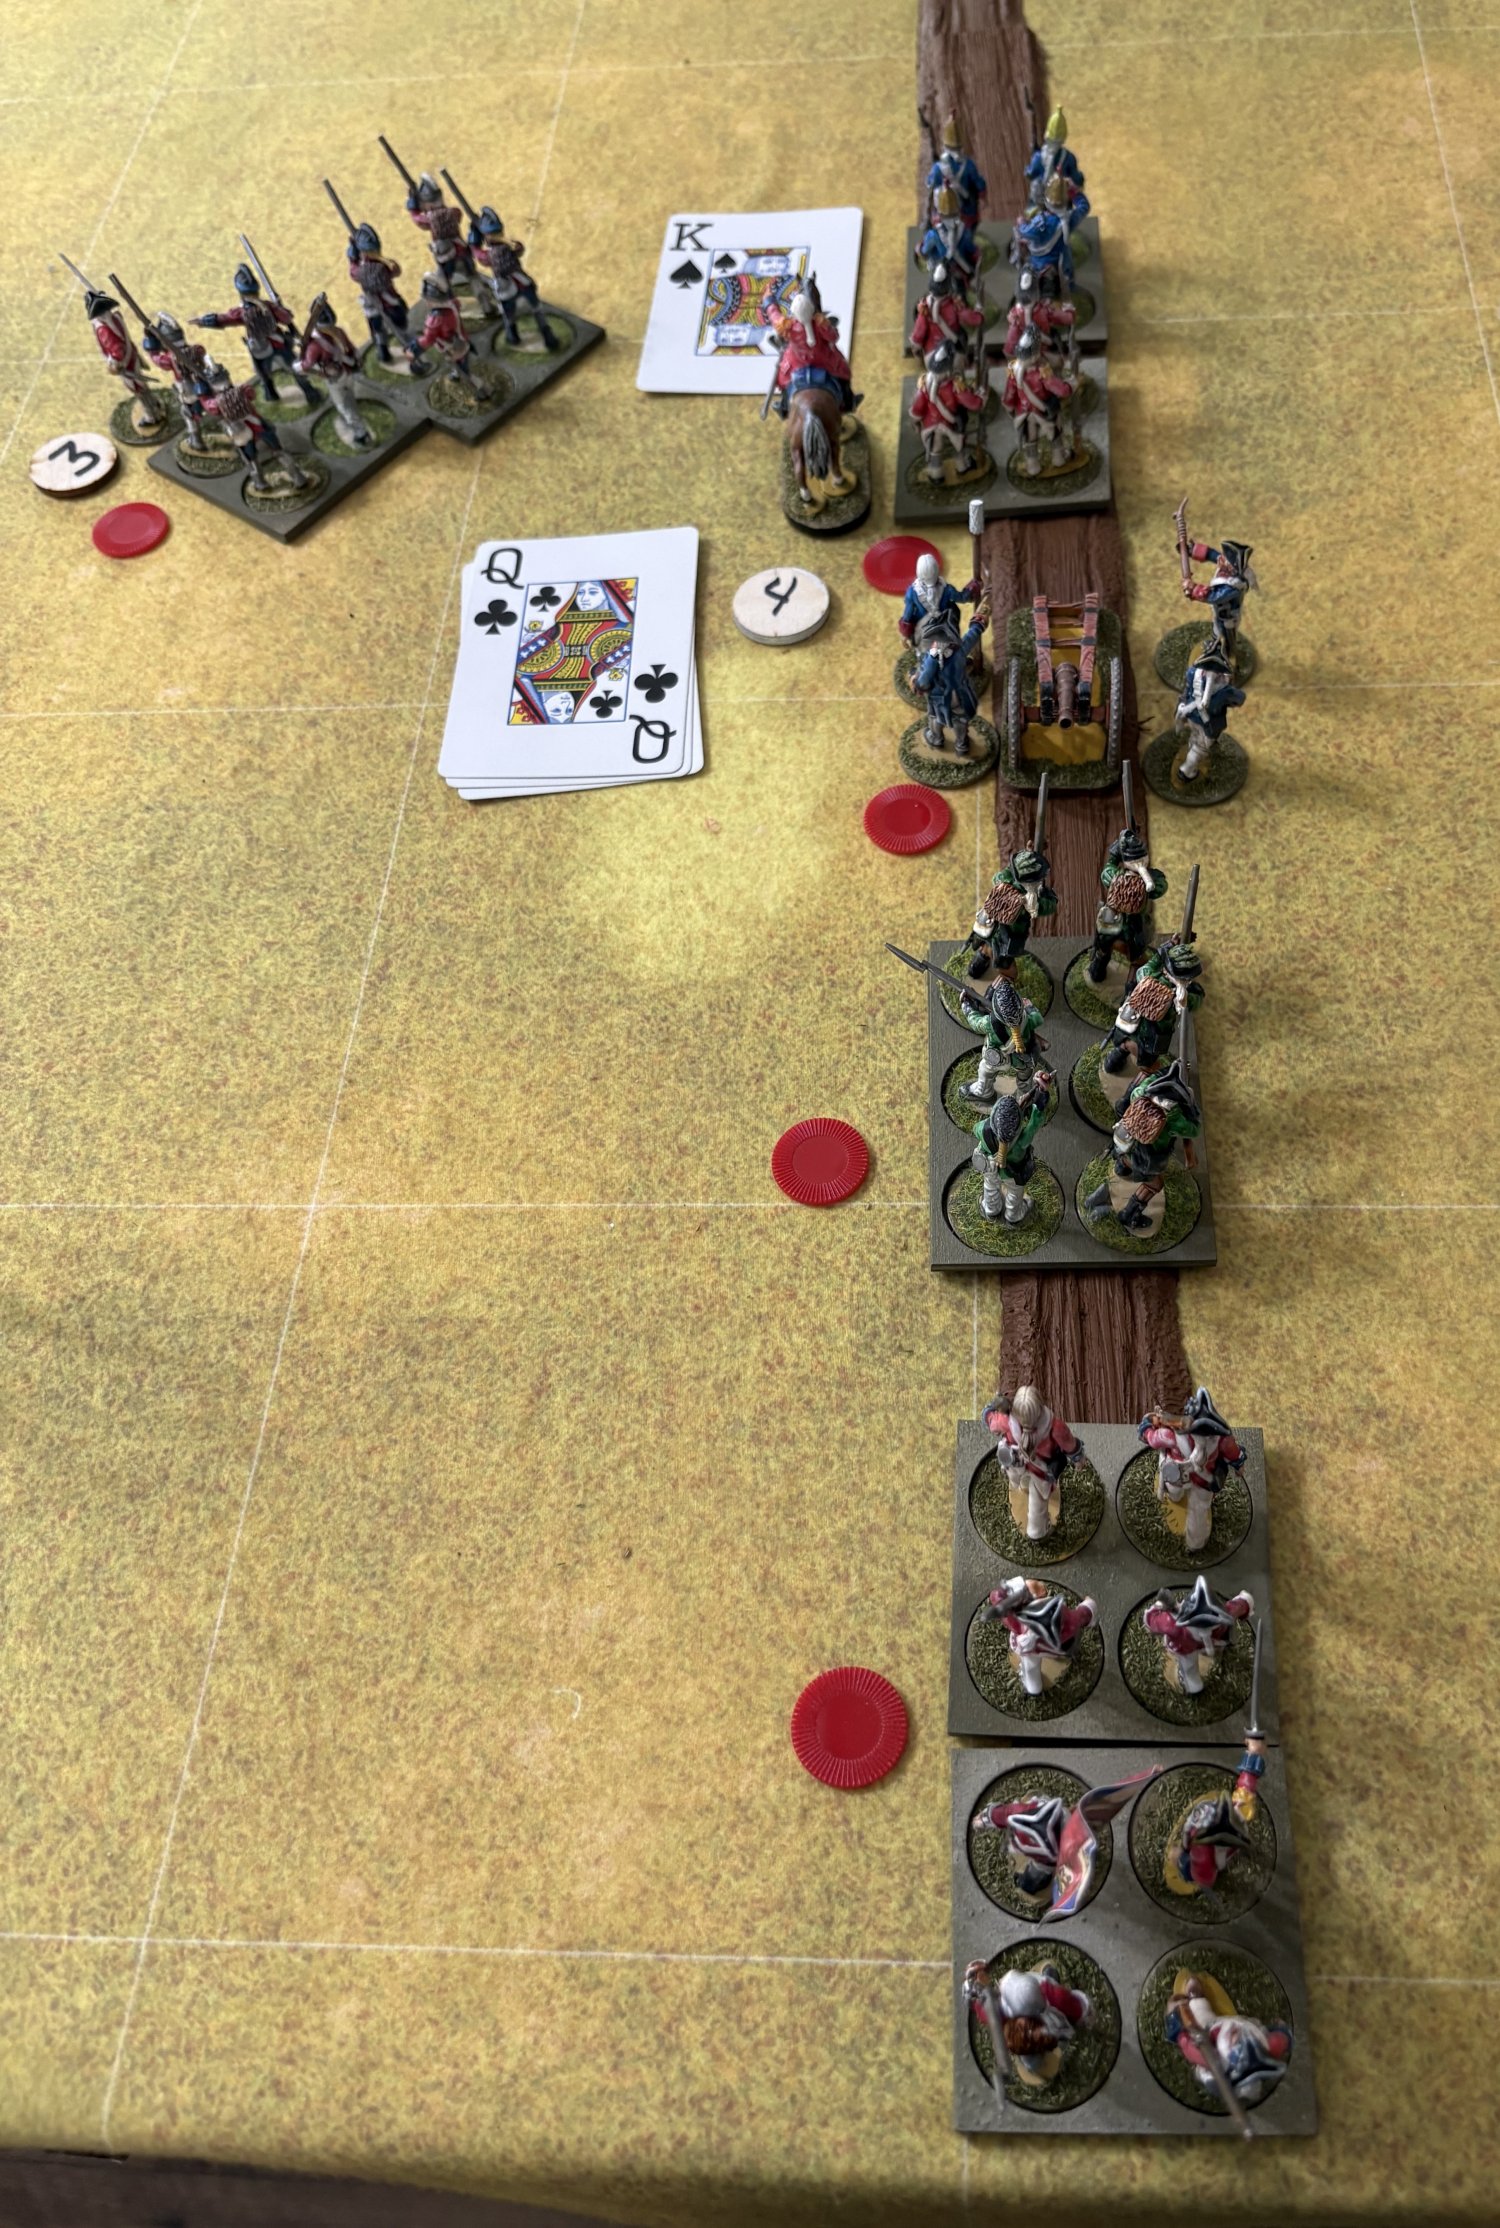
LT. Colonel Smyth ends their move by playing an 8 Card on them (1 Command) to reorder the Battle Line which includes all the units in the Column but not the Lights. A Unit or Battle Line may only have one card played on them as an Action Card. If none of the actions on this playing card are reorder then a second card may be played that will only be used to reorder.
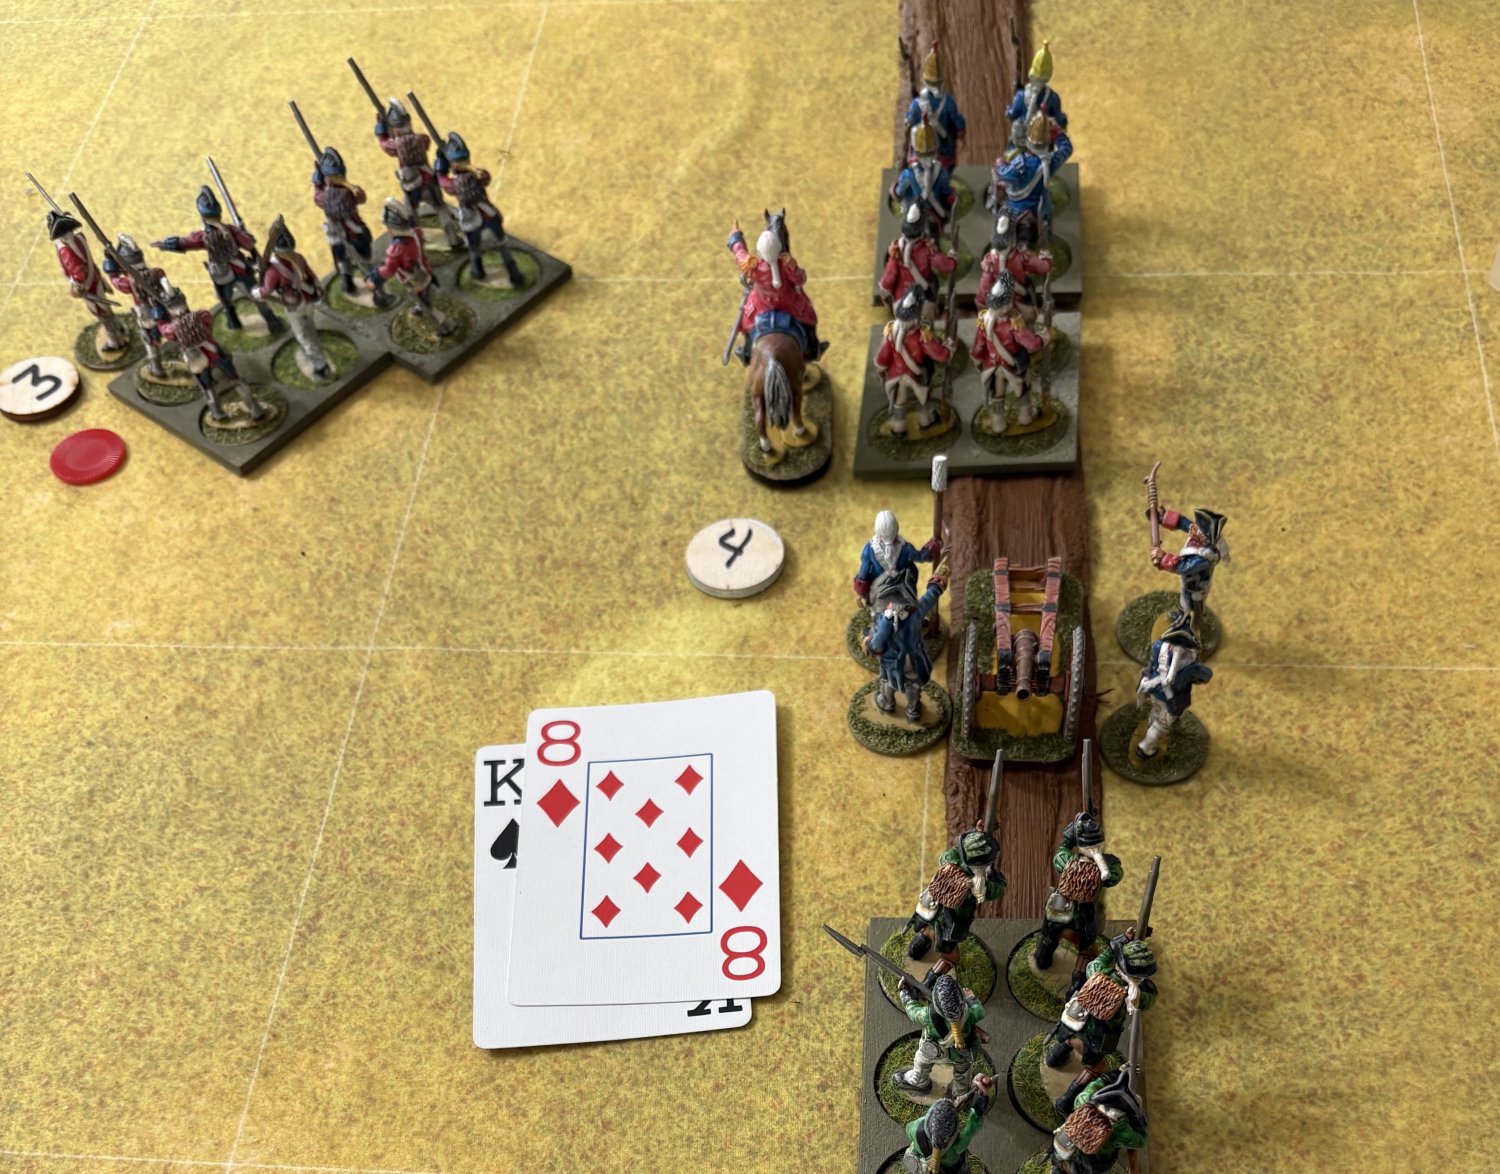
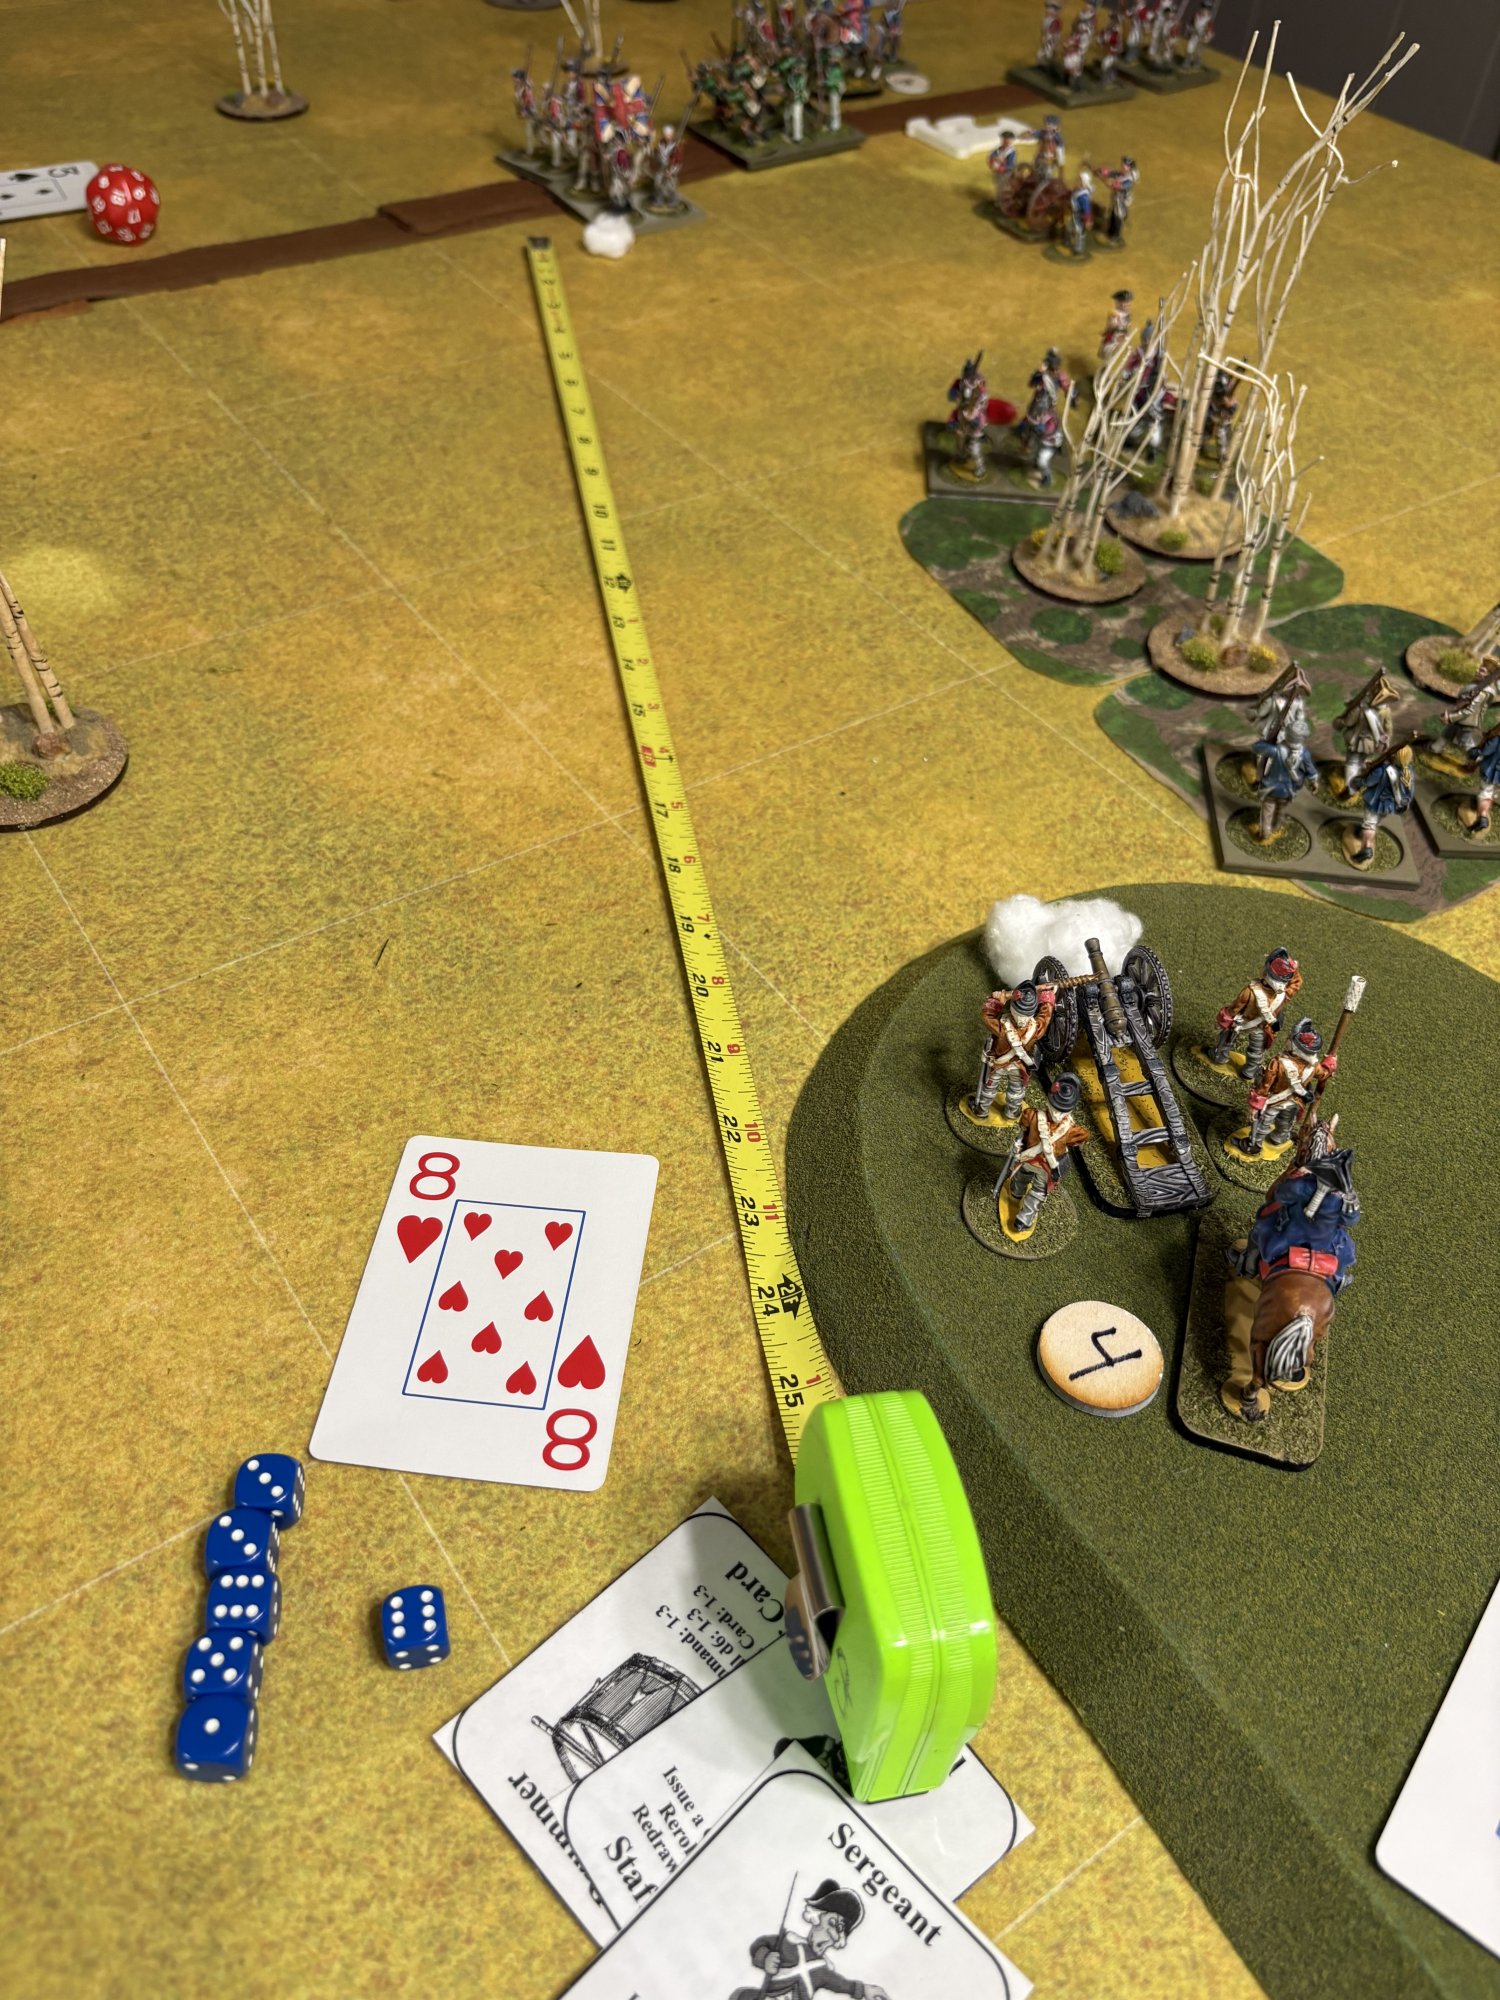
It is now the Colonials move and their gun sees the Grenadiers at the head of the column and opens fire. Their Leader plays a King which will allow them to fire twice. The second action will place a DIS on them after they fire the second time. Their firing is exceptionally fine. No doubt the slow moving Grenadiers made an excellent target.
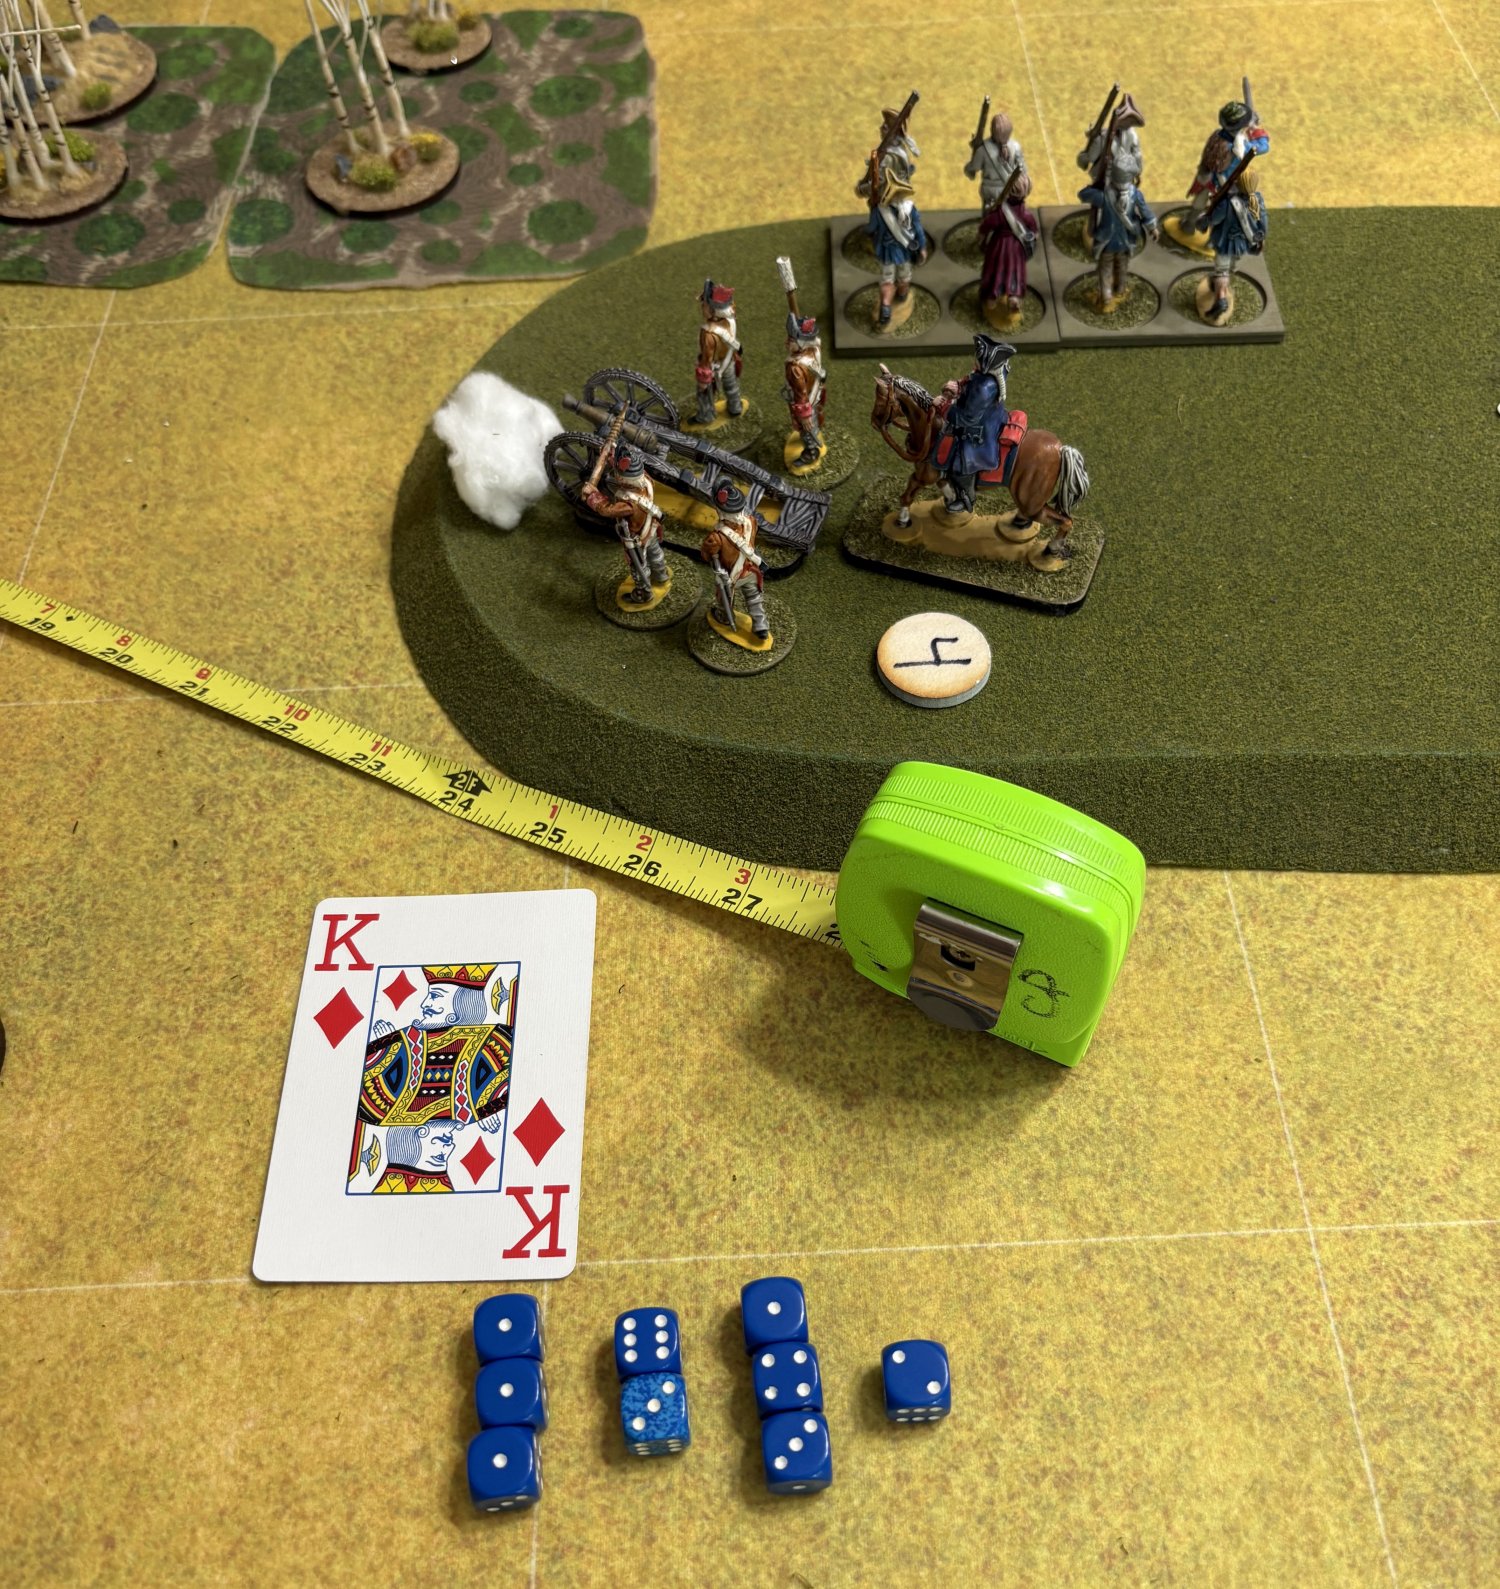
The dice are laid out to explain the firing mechanics. The fire is at long range (6″ – 30″). The gun rolls 1d6 for each gunner, they add 1 additional die for the attached Leader. They roll the 5 dice, 3 of which are 1s. Fire at Long Range hits on 1s. As die rolls are open-ended the 1s are rolled again looking for 1s. 1 more is rolled. It too is re-rolled but fails by rolling a 2. Final damage on the Grenadiers for the first salvo is 4 hits.
The second image shows the second salvo at the Grenadiers. Each time the Grenadiers are hit they must deal with the damage. The third image will explain that.
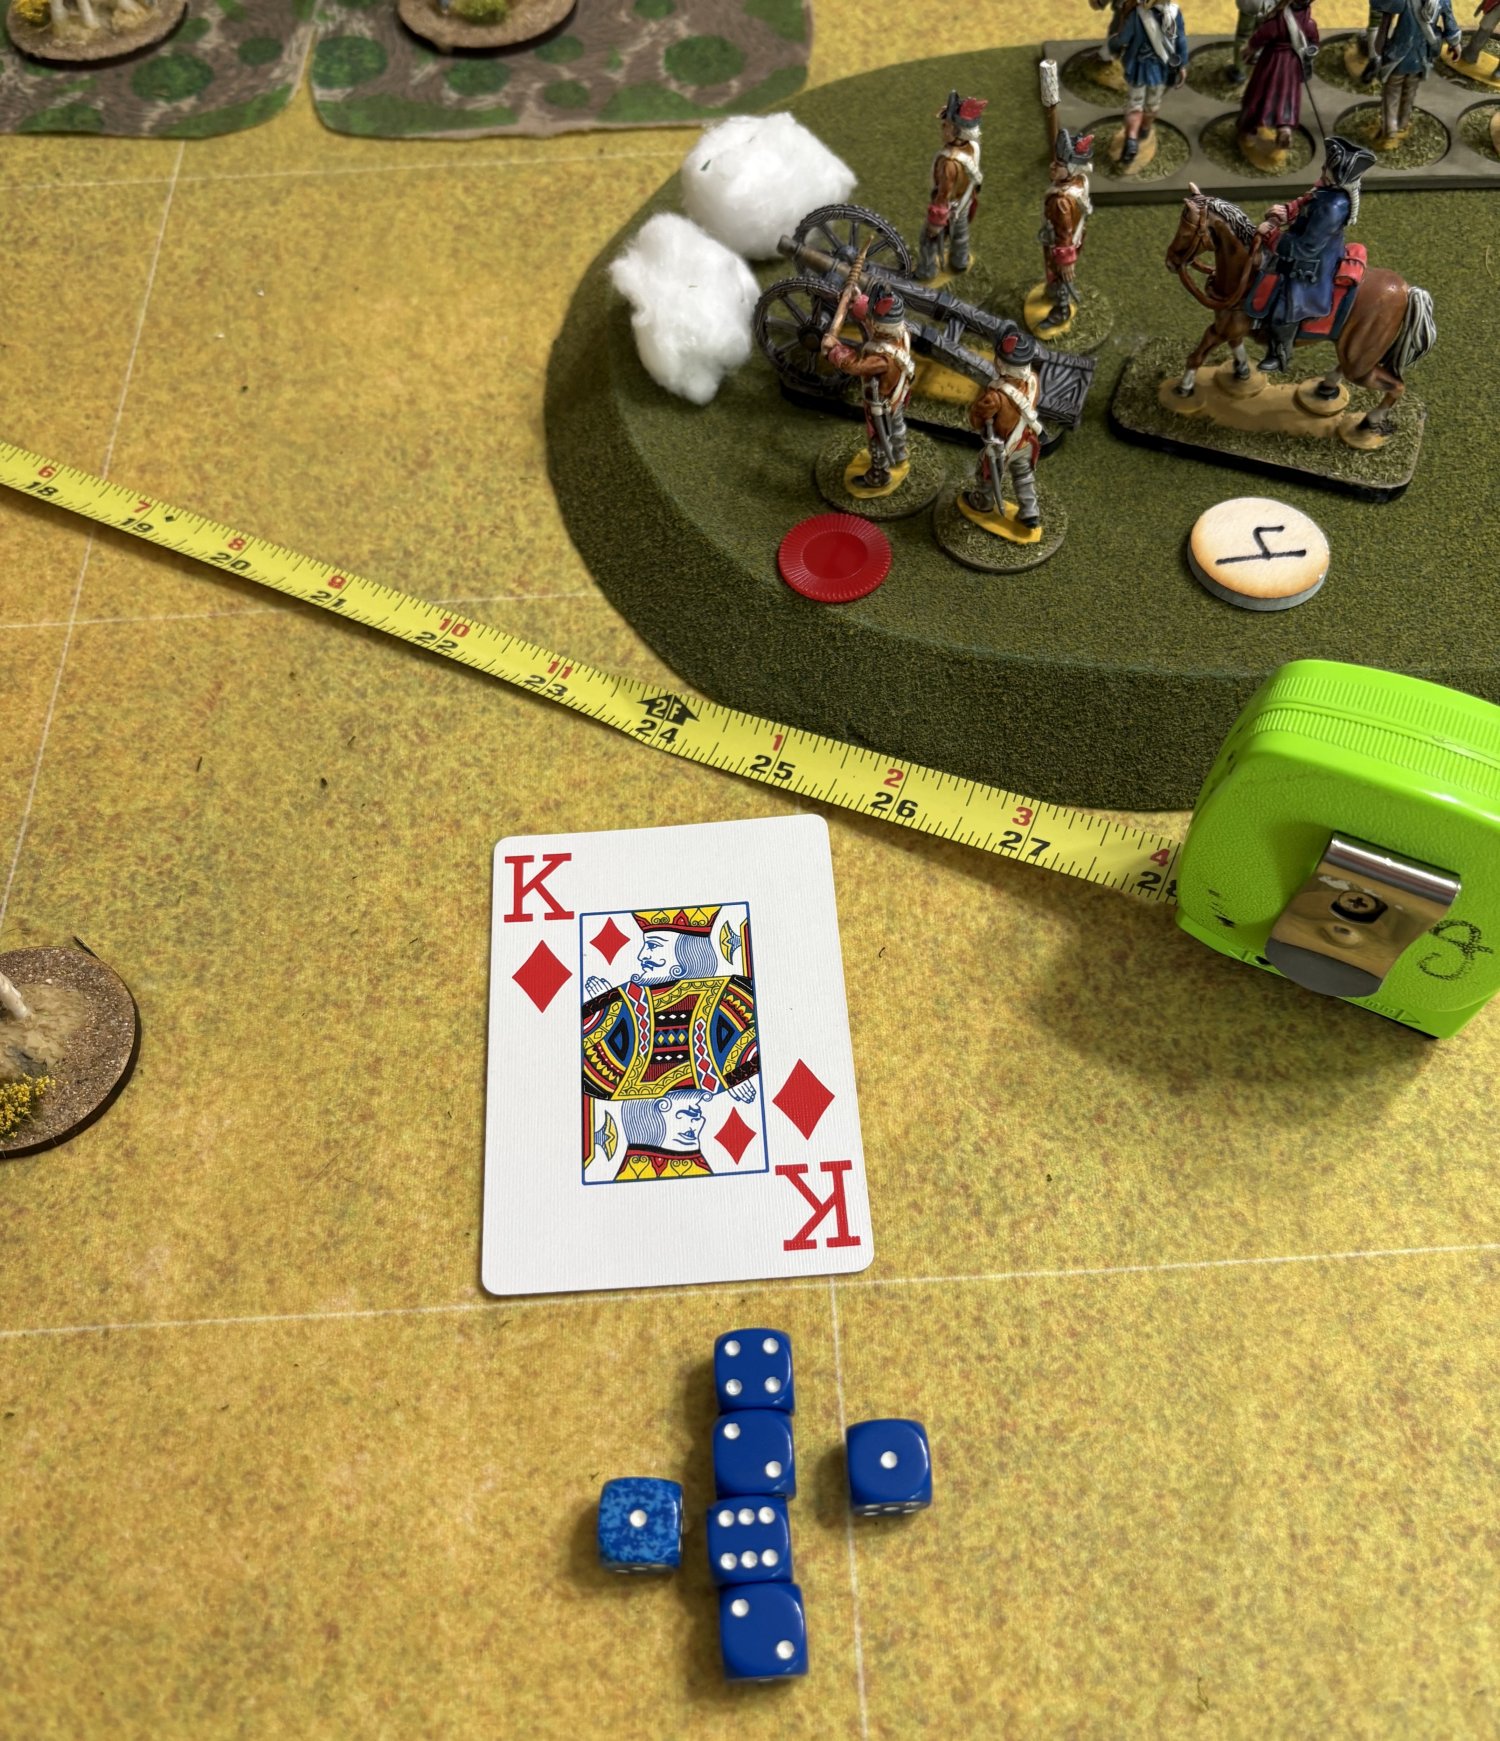
The second salvo scores an addition 1 for a hit which is rerolled for a second hit. A third roll was made for the second 1 but failed and was not included in the image. Two additional hits are added to the Grenadiers.
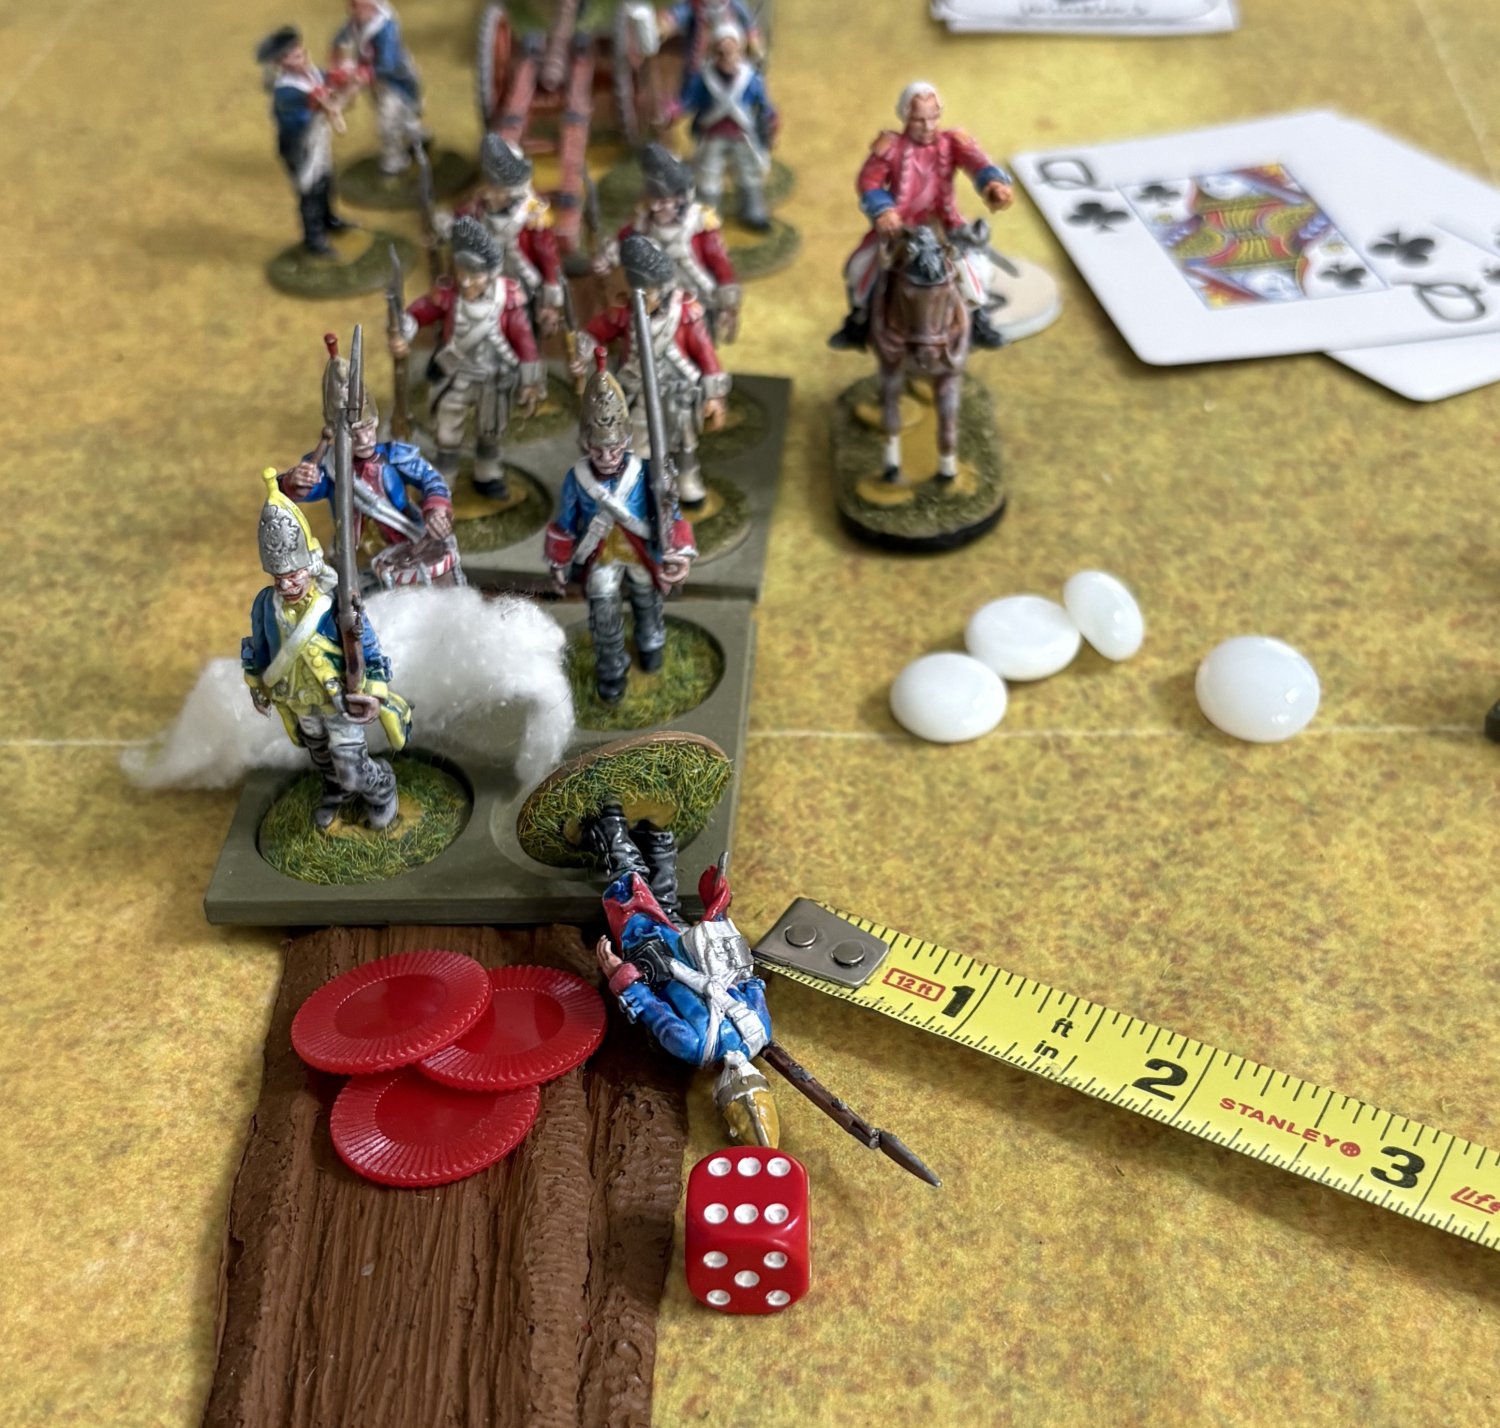
This image shows how the damage from the first salvo is dealt with. The first hit on a Unit must always be a save. The save is usually based on the formation order of the target. In this case the Grenadiers are in Close Order. They save on a 1-2. A die roll of 6 is rolled, no save. When a figure is hit it is tipped over to remind both sides a Regimental Morale Check will be required at the end of whichever side is Active. If you recall the first salvo placed 4 hits on the Grenadiers. They must now decide what these will do to the Unit. They can either make more saves or take DIS. They choose to take 3 DIS. They must also place a Moral Marker (white beads) on the unit for every hit they failed to save.
At the end of the second salvo the Grenadiers took 2 more hits. Again the first was a save and this time it passed. The Grenadiers also took the second hit as a DIS rather than try to save it.
The Colonial Leader plays an 8 Card (1 Command) on the gun as a re-order and restores the gun to good order removing the DIS marker. This completes his move. The British must now make a Regimental Morale Check. In the future we will refer to this as a Morale Check.
Morale Check
The British roll four dice, one for each unspent Unit currently on the table, and score 16. Their Regimental Morale Value is also 16. However, five Morale Markers impose a –2 modifiers, while six DIS impose another –6, reducing the final result to 8. The Regiment therefore fails by 8 and must perform eight points of Outcome Moves.
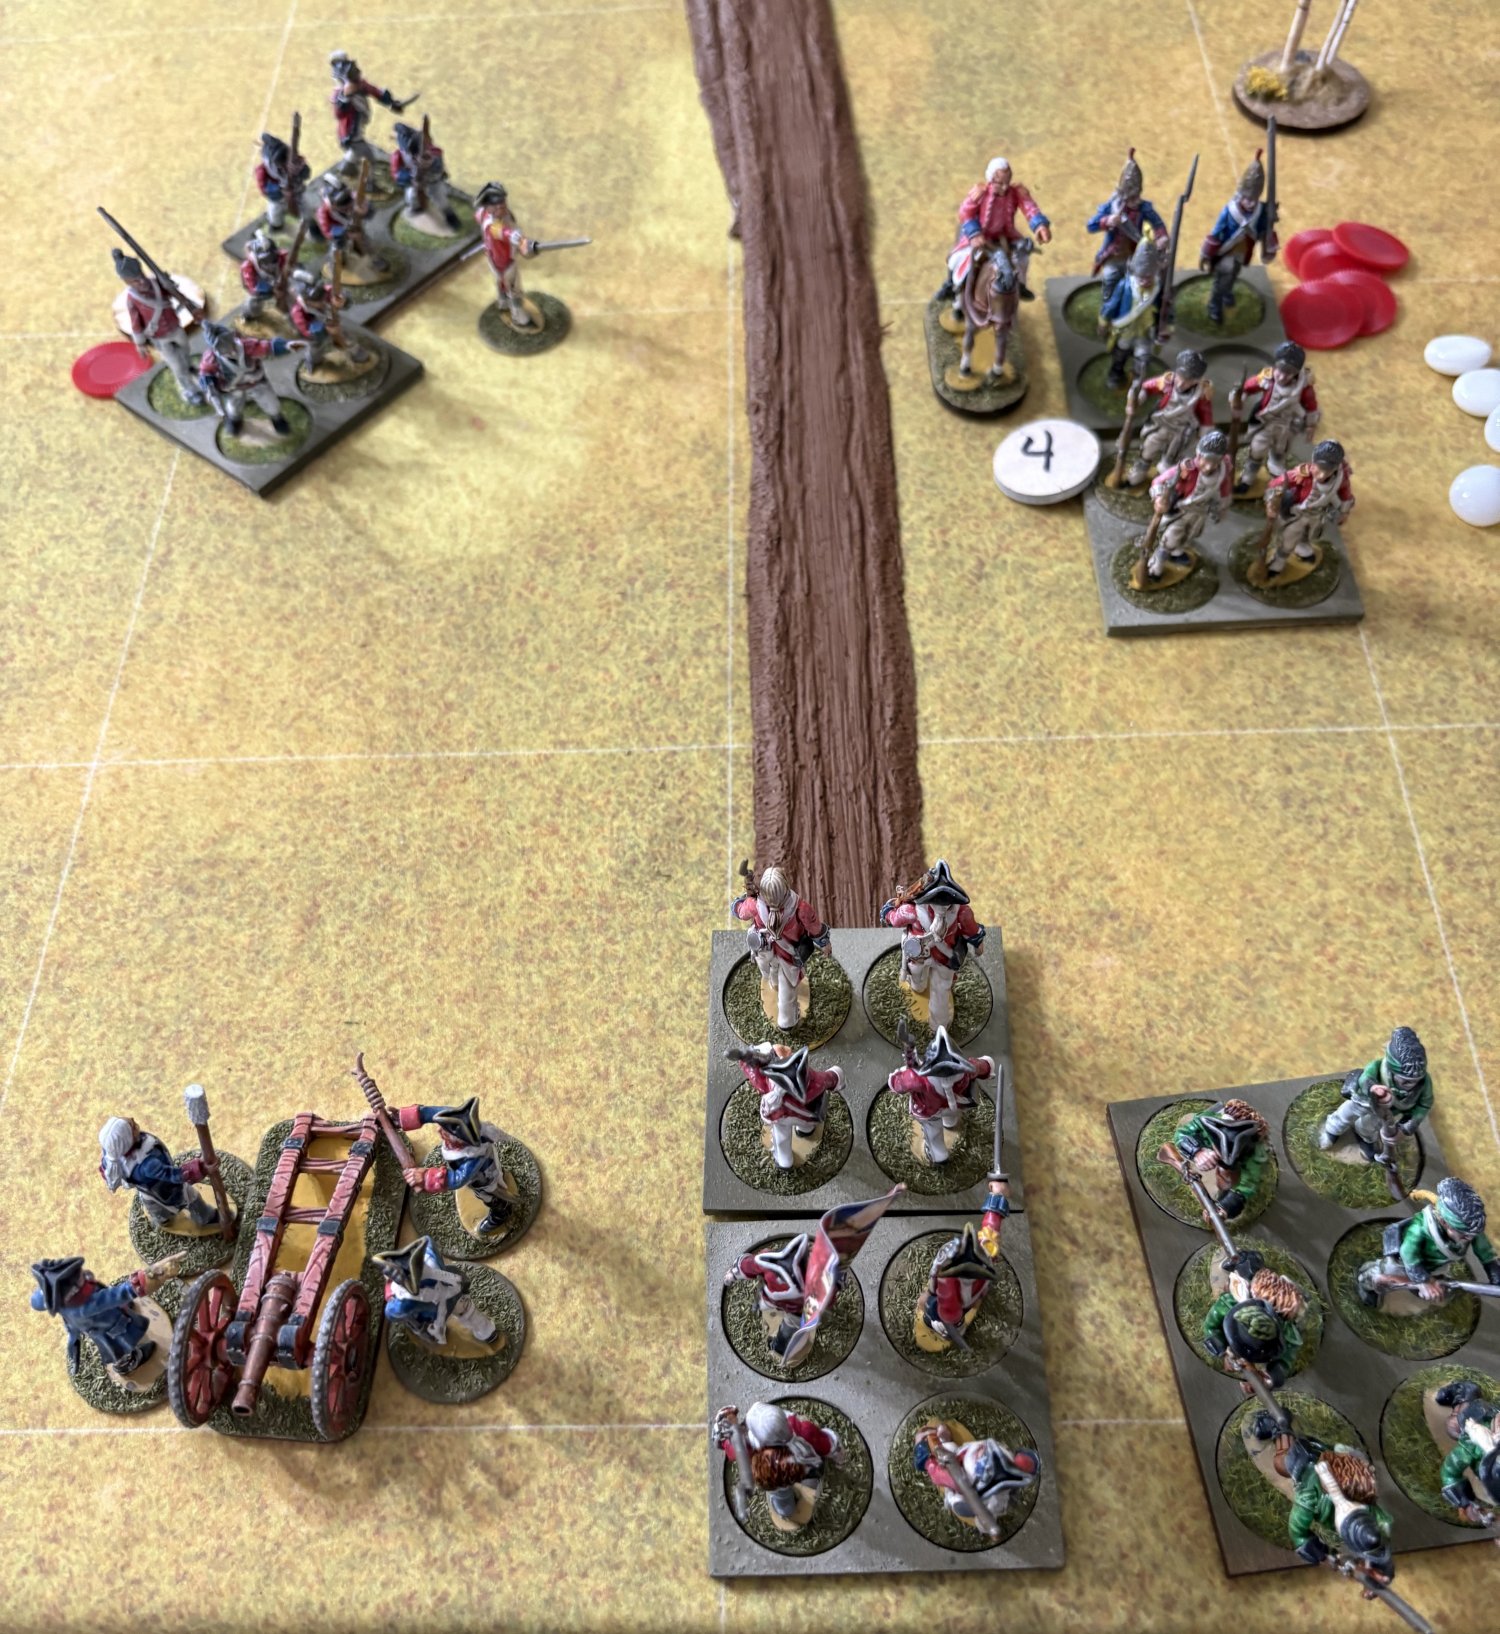
There are three levels of Outcome Moves. The first is a retire 3″ to the rear facing forward. The second is a Retreat another 3″ to the rear with back to the enemy. The third is a Break with the Unit being removed. The Grenadiers opt to Retire and then Retreat 6″ to the rear facing away from the enemy. This takes away 2 Outcome Move points. This followed by the Light Infantry, Gun and Loyalists doing the same. The picture shows the final result of the Morale Failure.
Turn 2 — Smyth Reorganizes
As the Colonials went first this ends the game turn. Both sides now draw a Randomizer Card and apply any modifiers to their card.
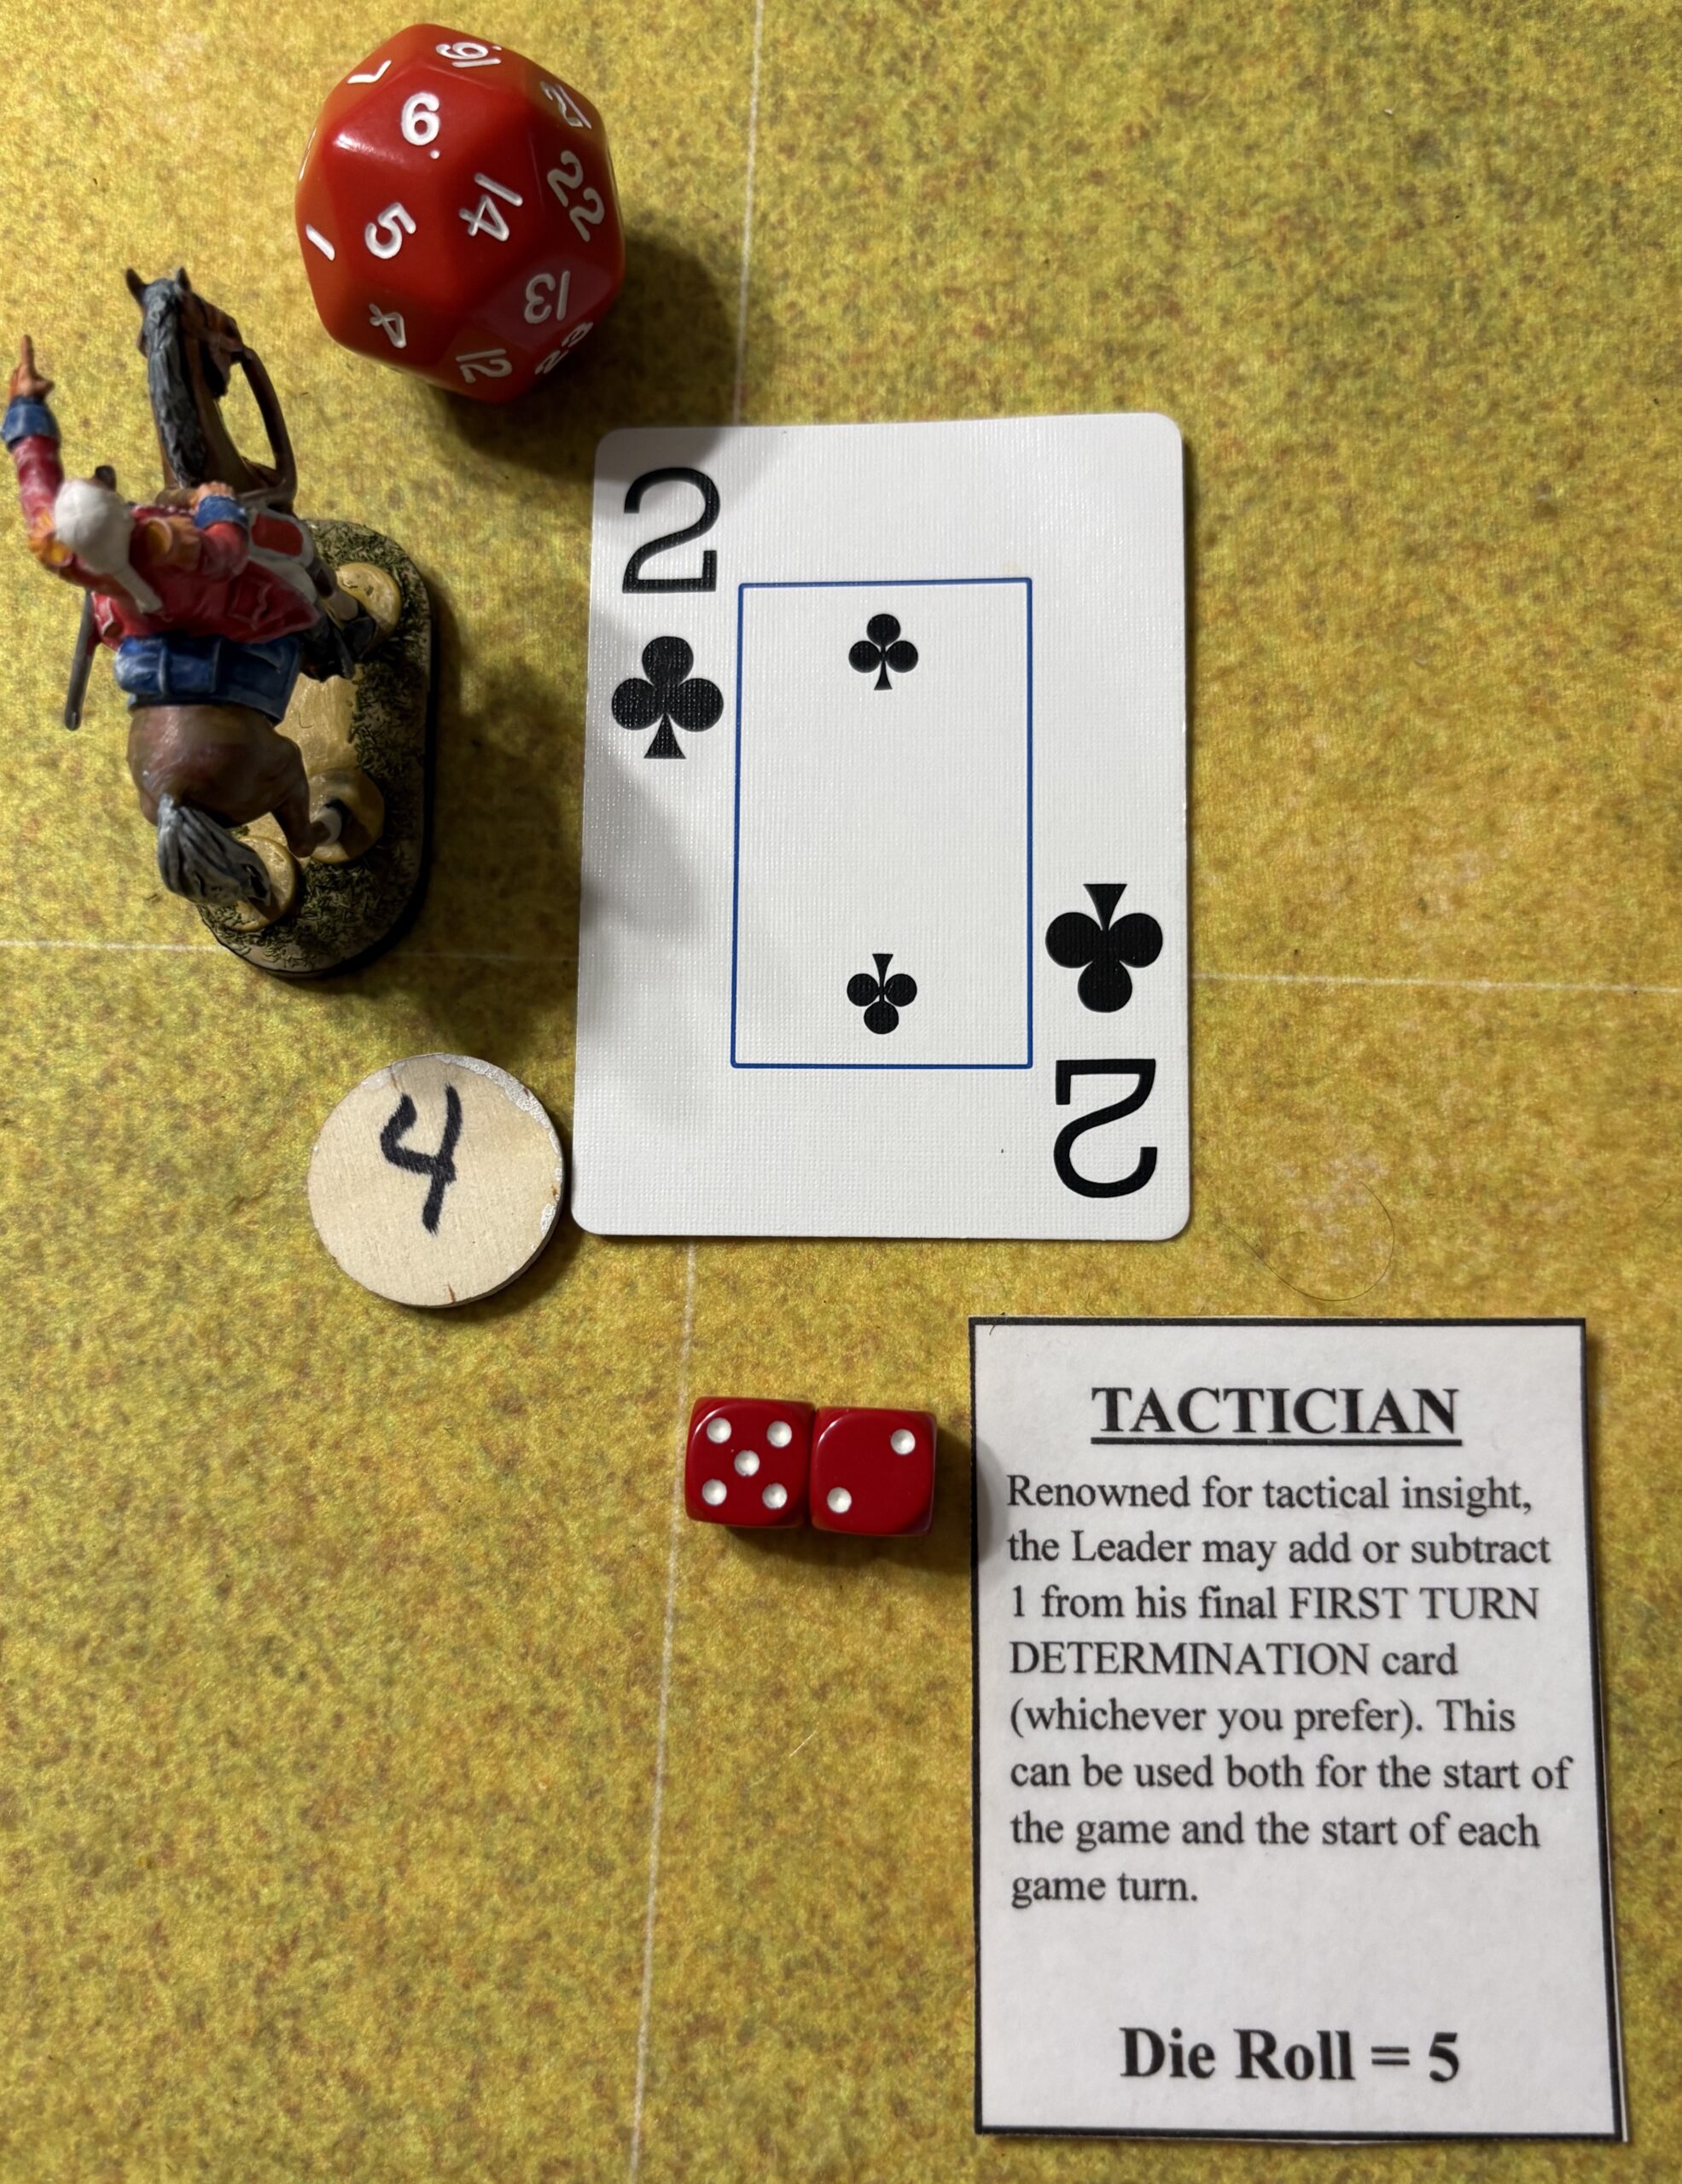
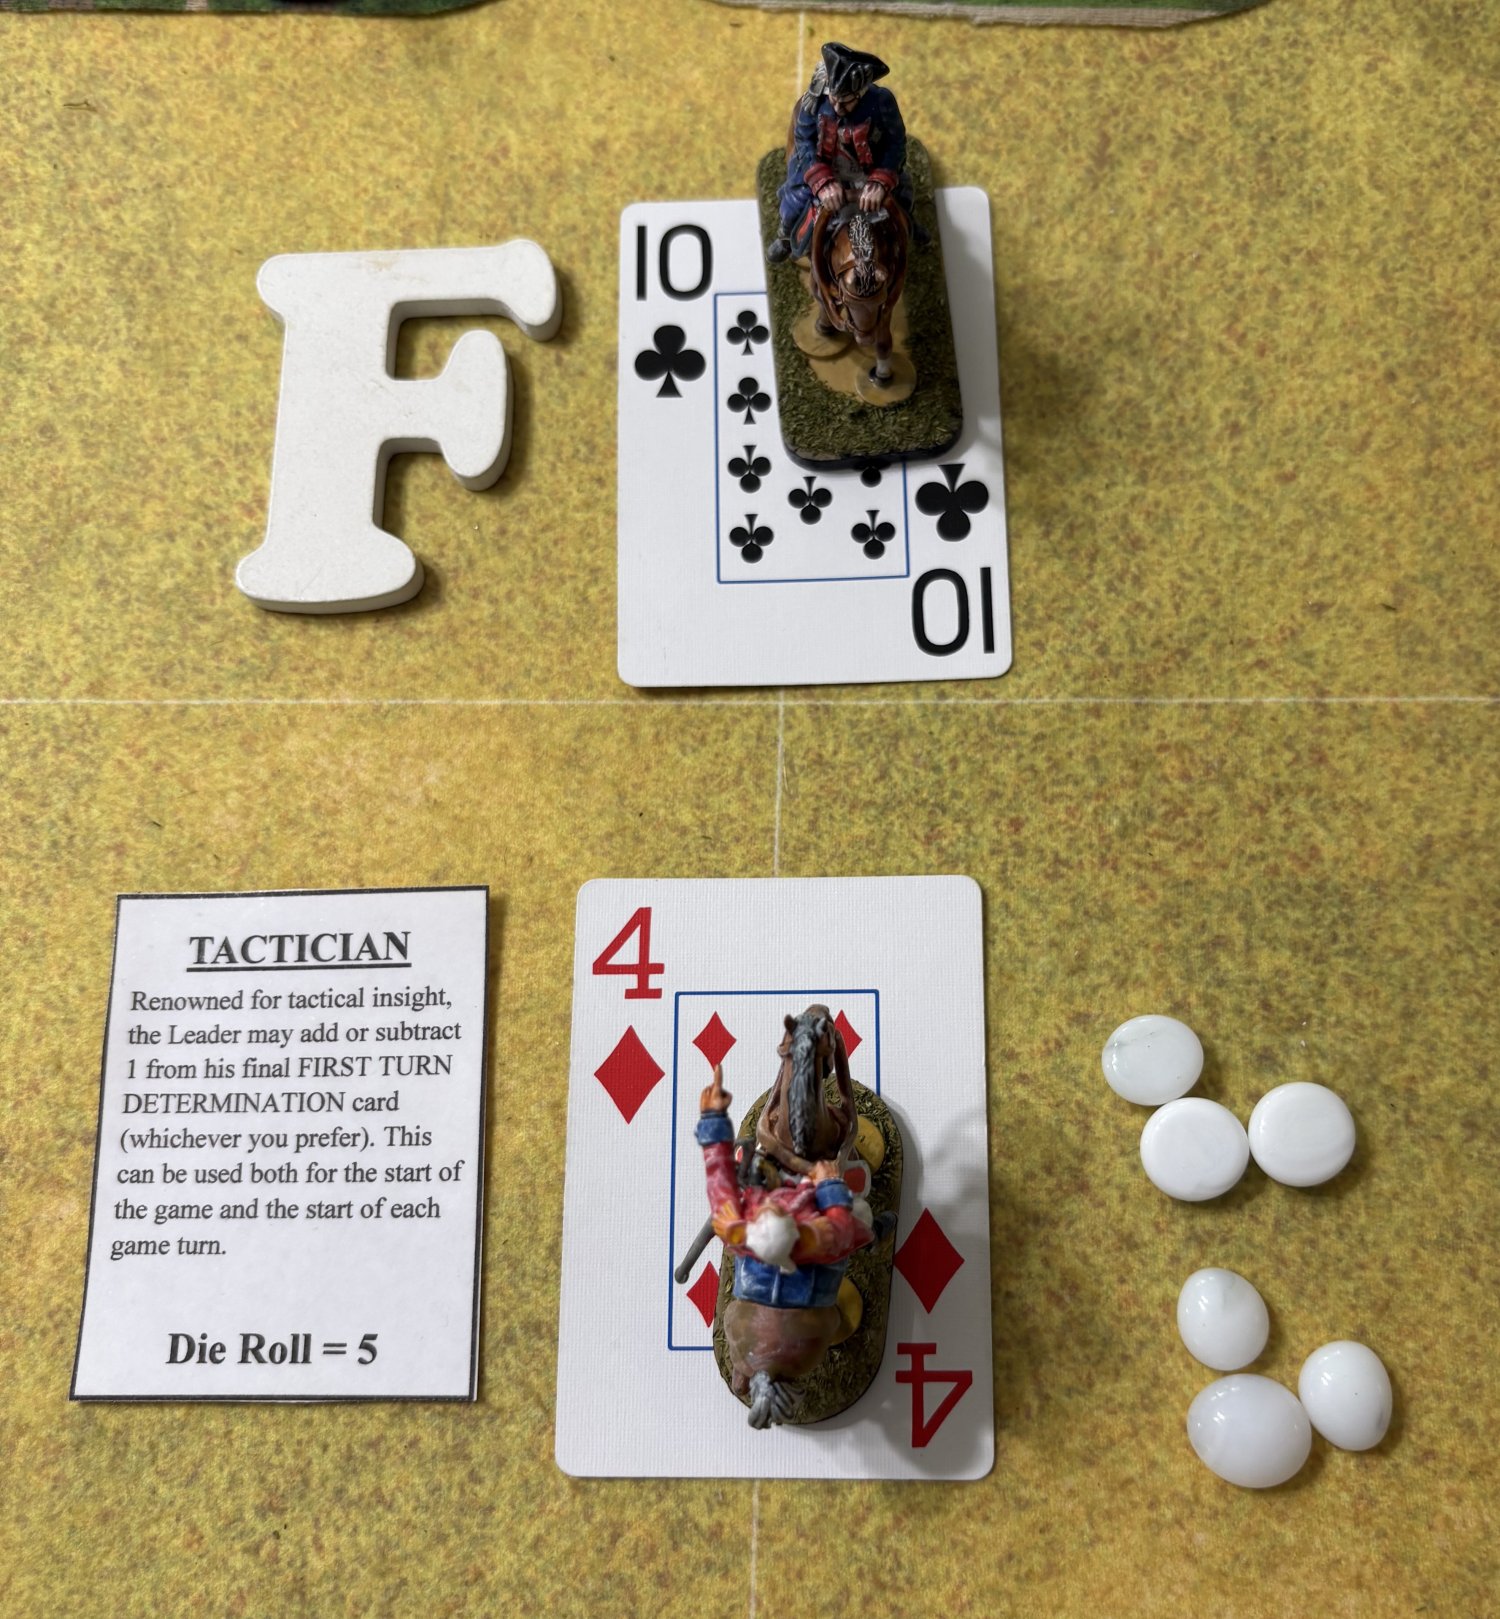
The Colonials win. Lt. Colonel Smyth draws a red card which is a -1. The Colonials black numbered card is a +1. LT/ Colonel Smyth has two penalties from the Morale Markers. He does have a Tactician Trait which cancels one of these penalties however his total is still a -2 so he loses.
The higher modified card gets to decide which side goes first. The Colonials choose themselves to go first. The white “F” letter is a game aide that allows players to remember which side went first that game turn.
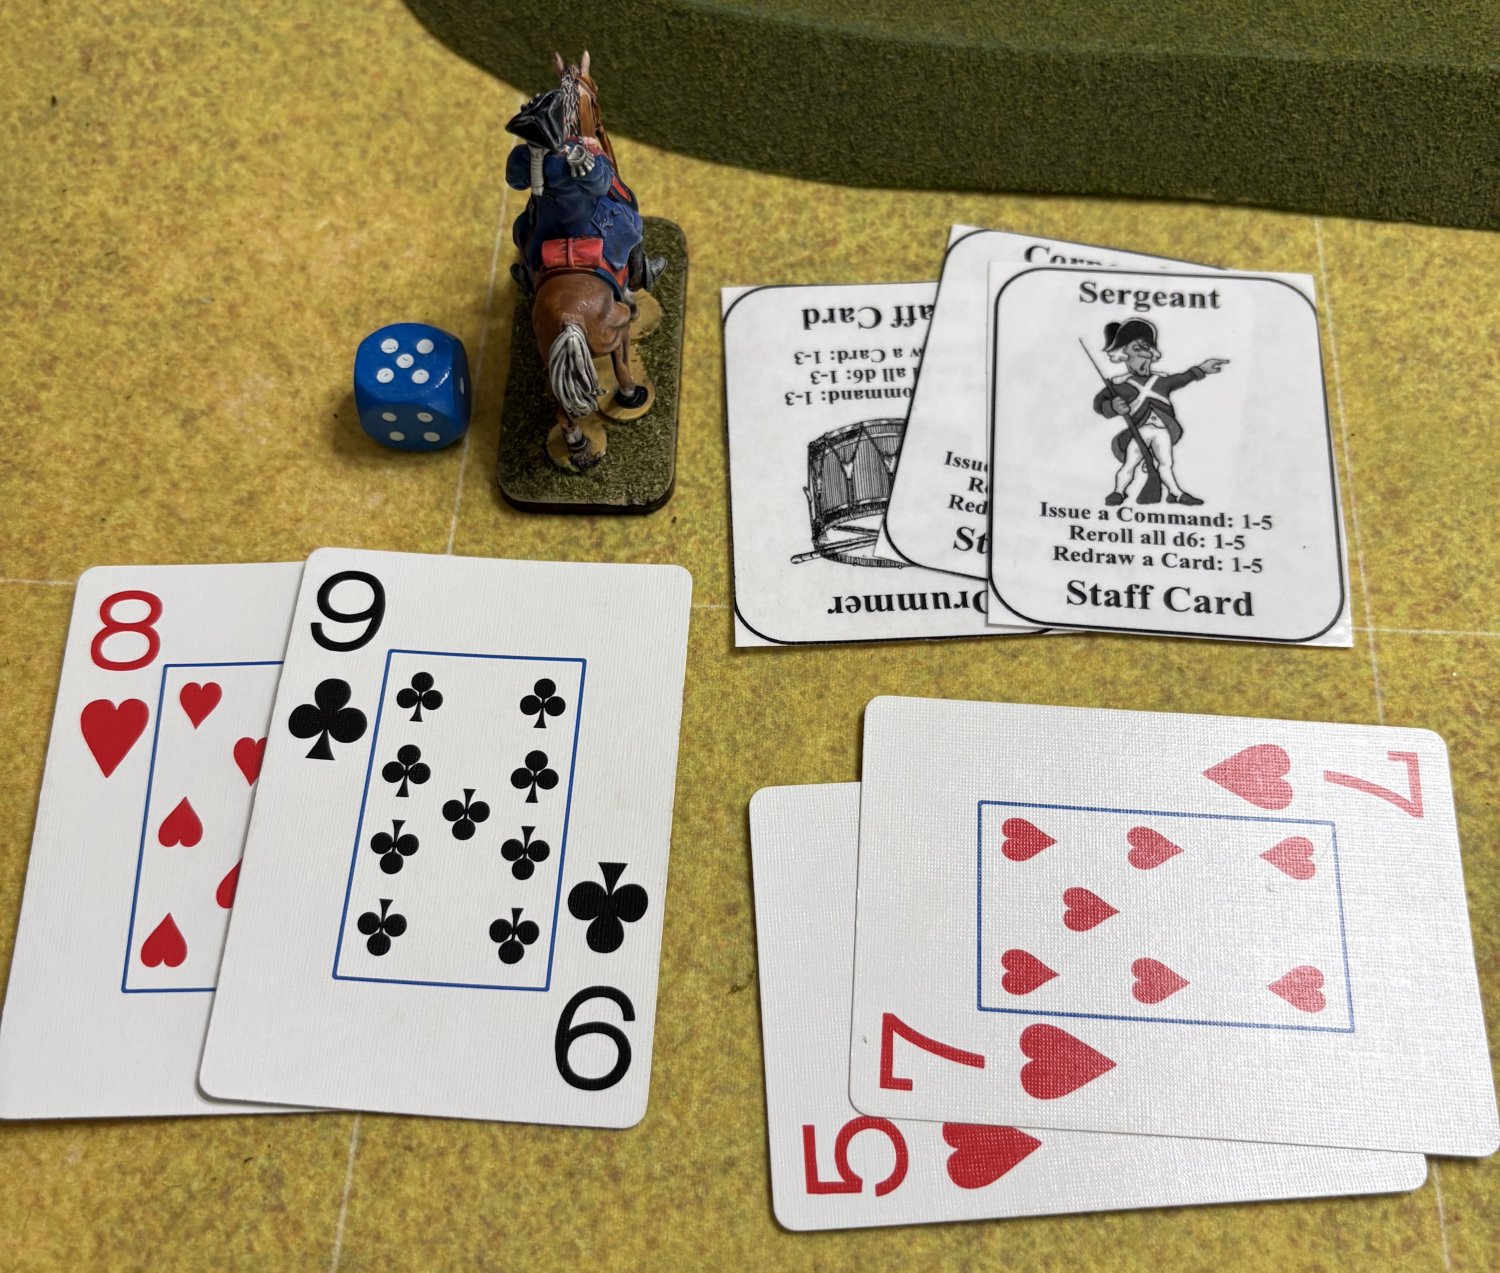
The Colonial leader now rolls a d6 and after modifiers (there are none) compares it to his Military Rank of 4. He rolls 2 over, for every number over he forfeits a card. He holds 2 cards and is able to draw 2 more bringing him up to 4 total. The 5 and 7 are added to his hand. Color does not matter in the Command Card system of Light Bobs.
At the beginning of his turn (turn 2) he plays a 9 on the Rifle armed Militia to Command them to enter the woods. He again fires the gun using the 8 card. The fire has no effect and is not shown here. BTW the round wooden disk with the number 4 reminds us of the Leaders Military rank.
It is now Lt. Colonel Smyth’s turn. He is going to determine how many Command Cards he gets. He starts with 2 saved from turn 1. He has 6 Morale Markers against him which is a +2 to his die roll. The large d6 with a 2 is his roll. This is increased to 4 which is his Military Rank. As he has saved 2 cards he can draw 2 more. He draws a Joker and a 7. The Joker is the equivalent to 3 Commands but may be split up amongst any Units. The blue die with a 2 shows he had 2 and the red 4 shows his final total die rill. Morale Markers are removed after every Command Card Determination Phase of a sides game turn. Not shown here Lt. Royce also rolled for his Command Card but failed. Lt. Colonel Smyth passes him the 7 card.
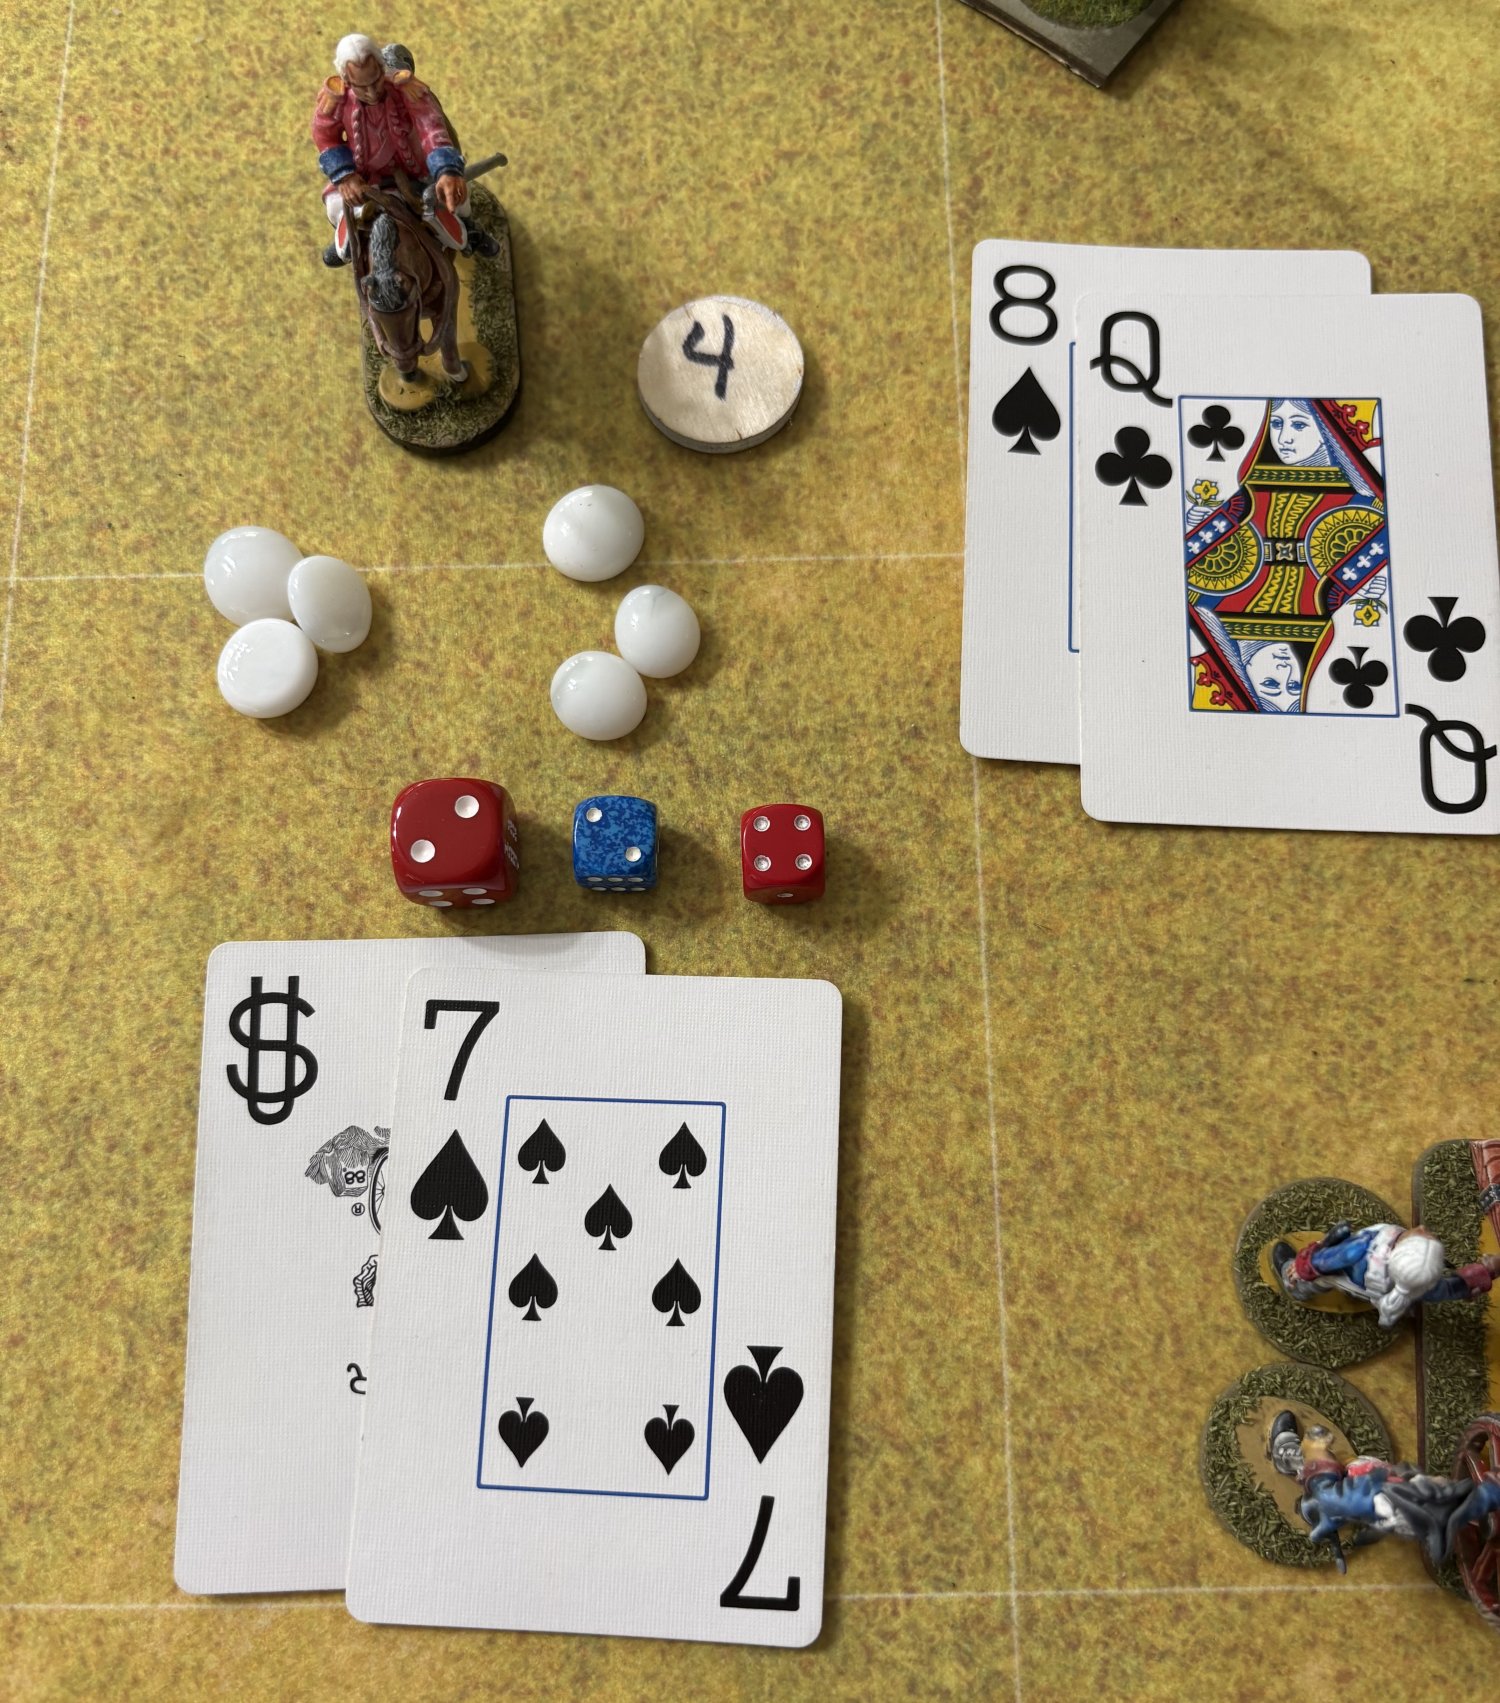
Smyth now sets about reorganizing his men. He plays the Joker on the Grenadiers which removes 3 DIS markers. He plays the 8 to advance the Regular and Loyalist Units up the road 1 move. Meanwhile Lt. Royce reorders the Light infantry. The playing of the Joker triggers a reshuffle of the remaining deck with any played cards. Cards held by Officers are kept.
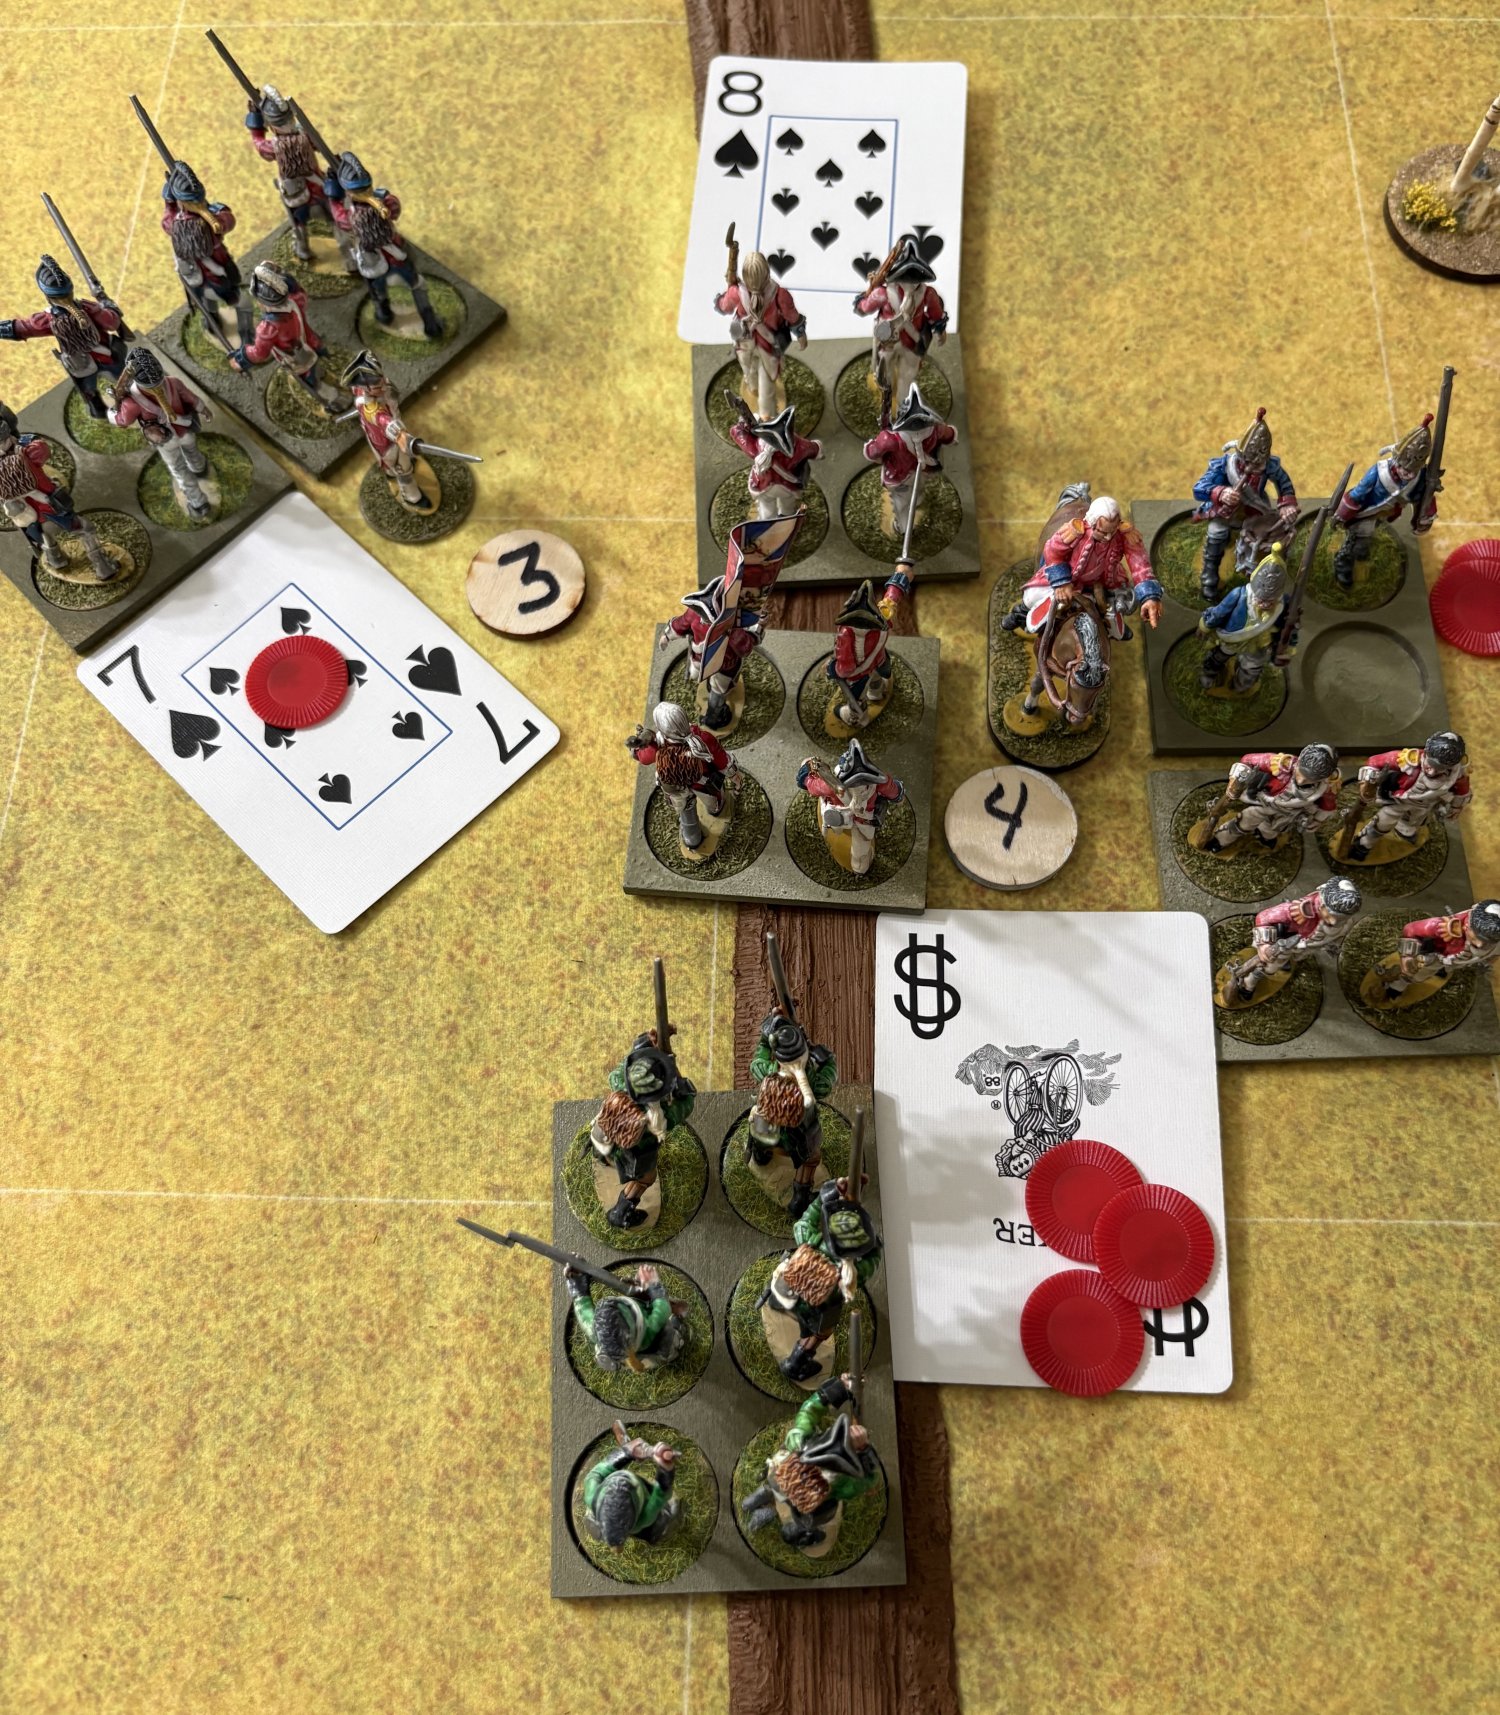
Turn 3 — The Advance Resumes
The British win the First move and take it.
Game Turn 3 First Move Determination phase. Both Commanders draw a black +1 card which is a tie. LT. Colonel Smyth however has his Tactician Trait which adds one to his card, the red 1 notes this. Smyth wins and chooses who will go first this turn. Naturally he takes it. 🙂
Lt. Colonel Smyth now rolls to determine his Command Cards. He still holds the Queen. He rolls successfully (die not shown) and adds 3 cards to his hand. Lt. Royce also rolls successfully and draws his own Command Card. Turn 3 starts well for the British.
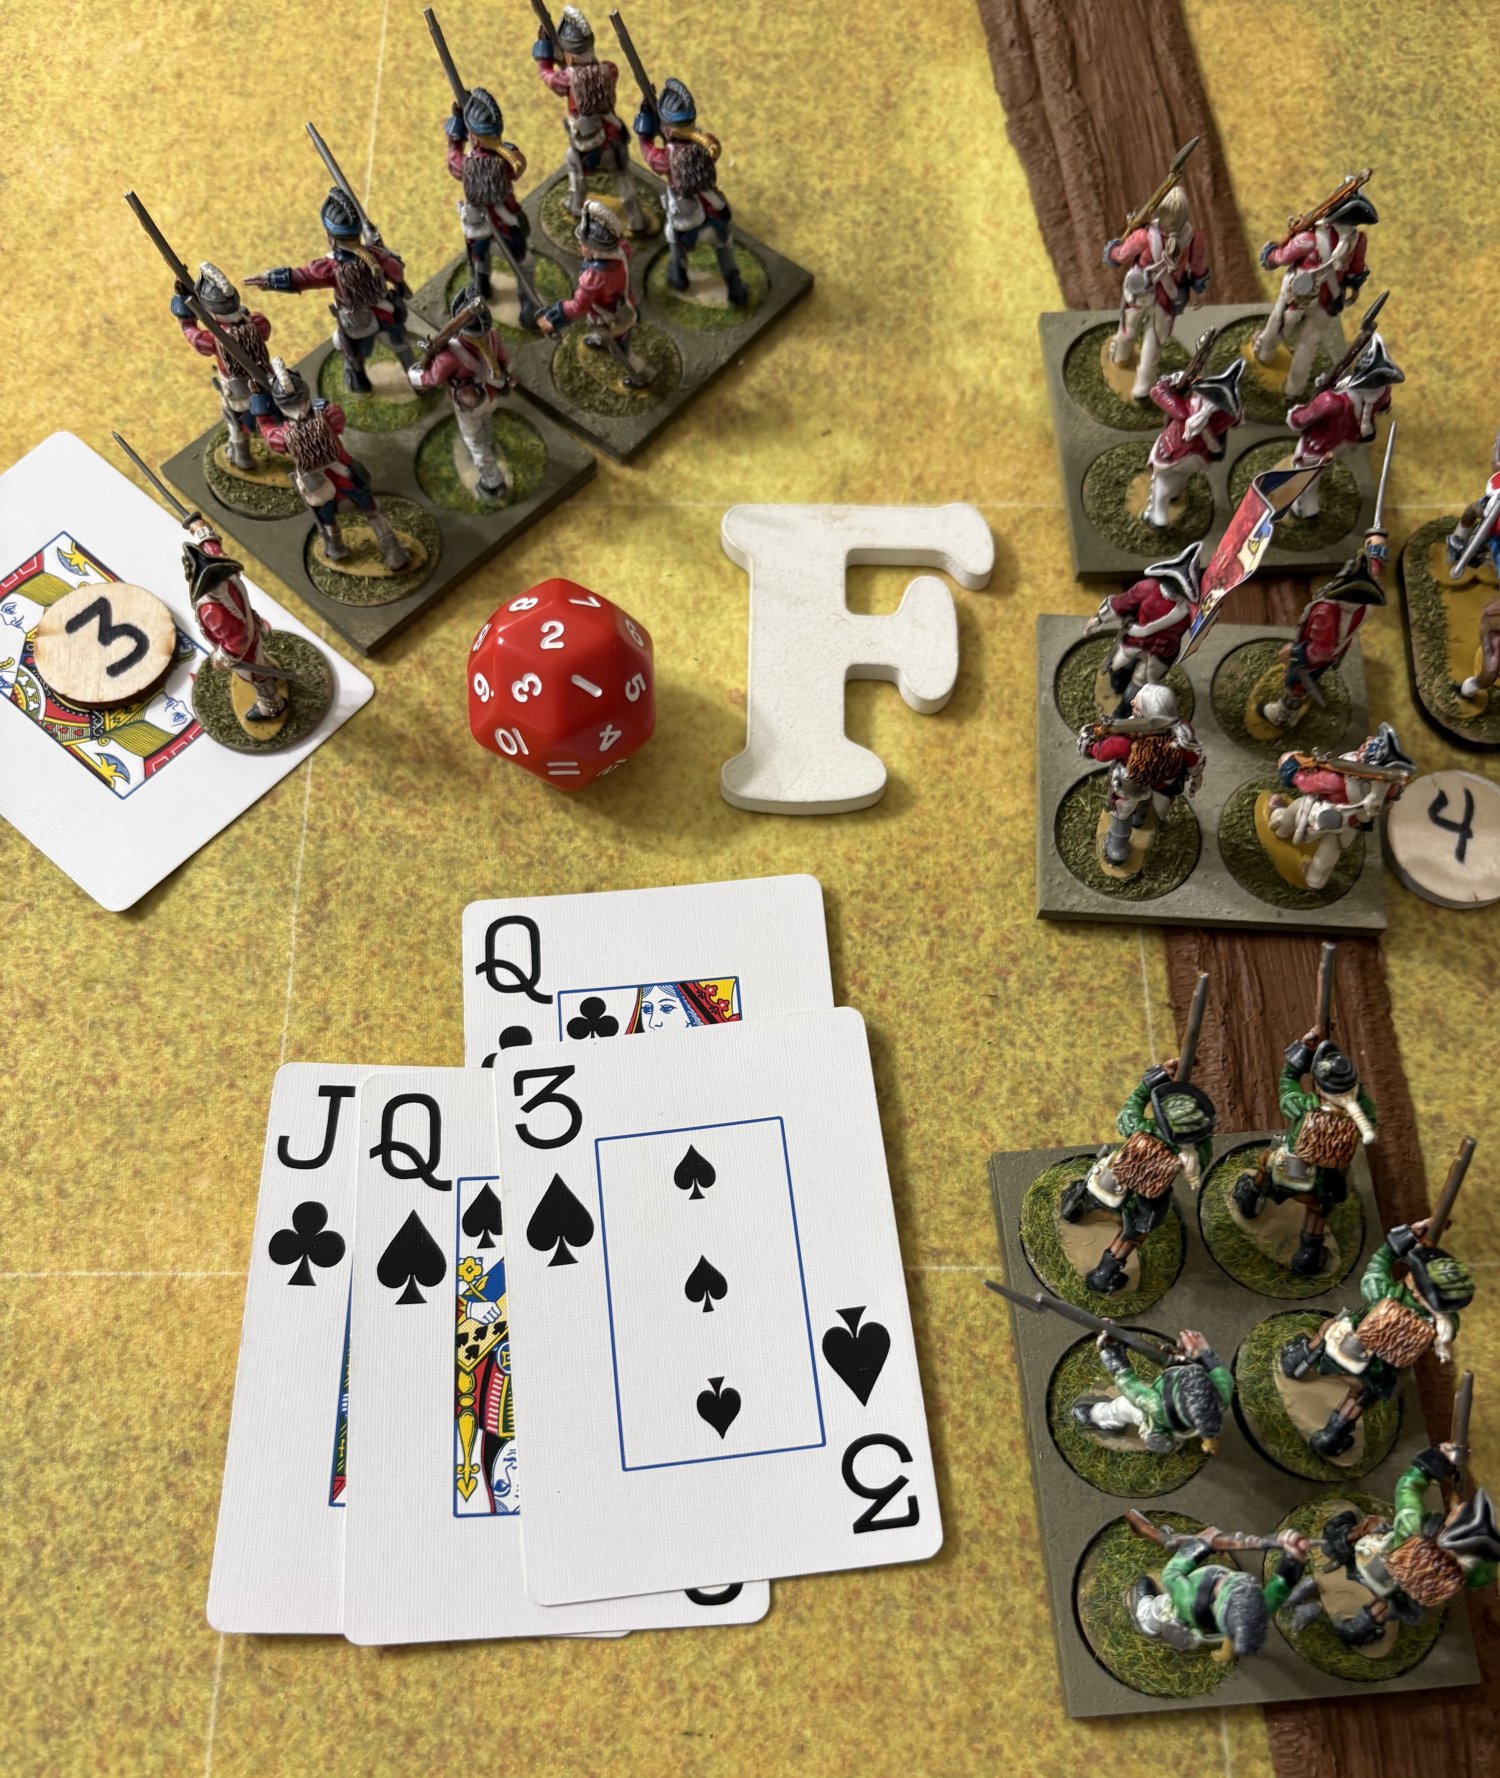
Smyth spends the turn getting his troops heading forward. He spends multiple Command Cards on them to do double moves, hence all the DIS on the Units. Not shown but his last action is to place a Card to reorder the Battle Line which includes all the Units except the gun and Light Infantry who are over 3″ from any other Unit in the Battle Line.
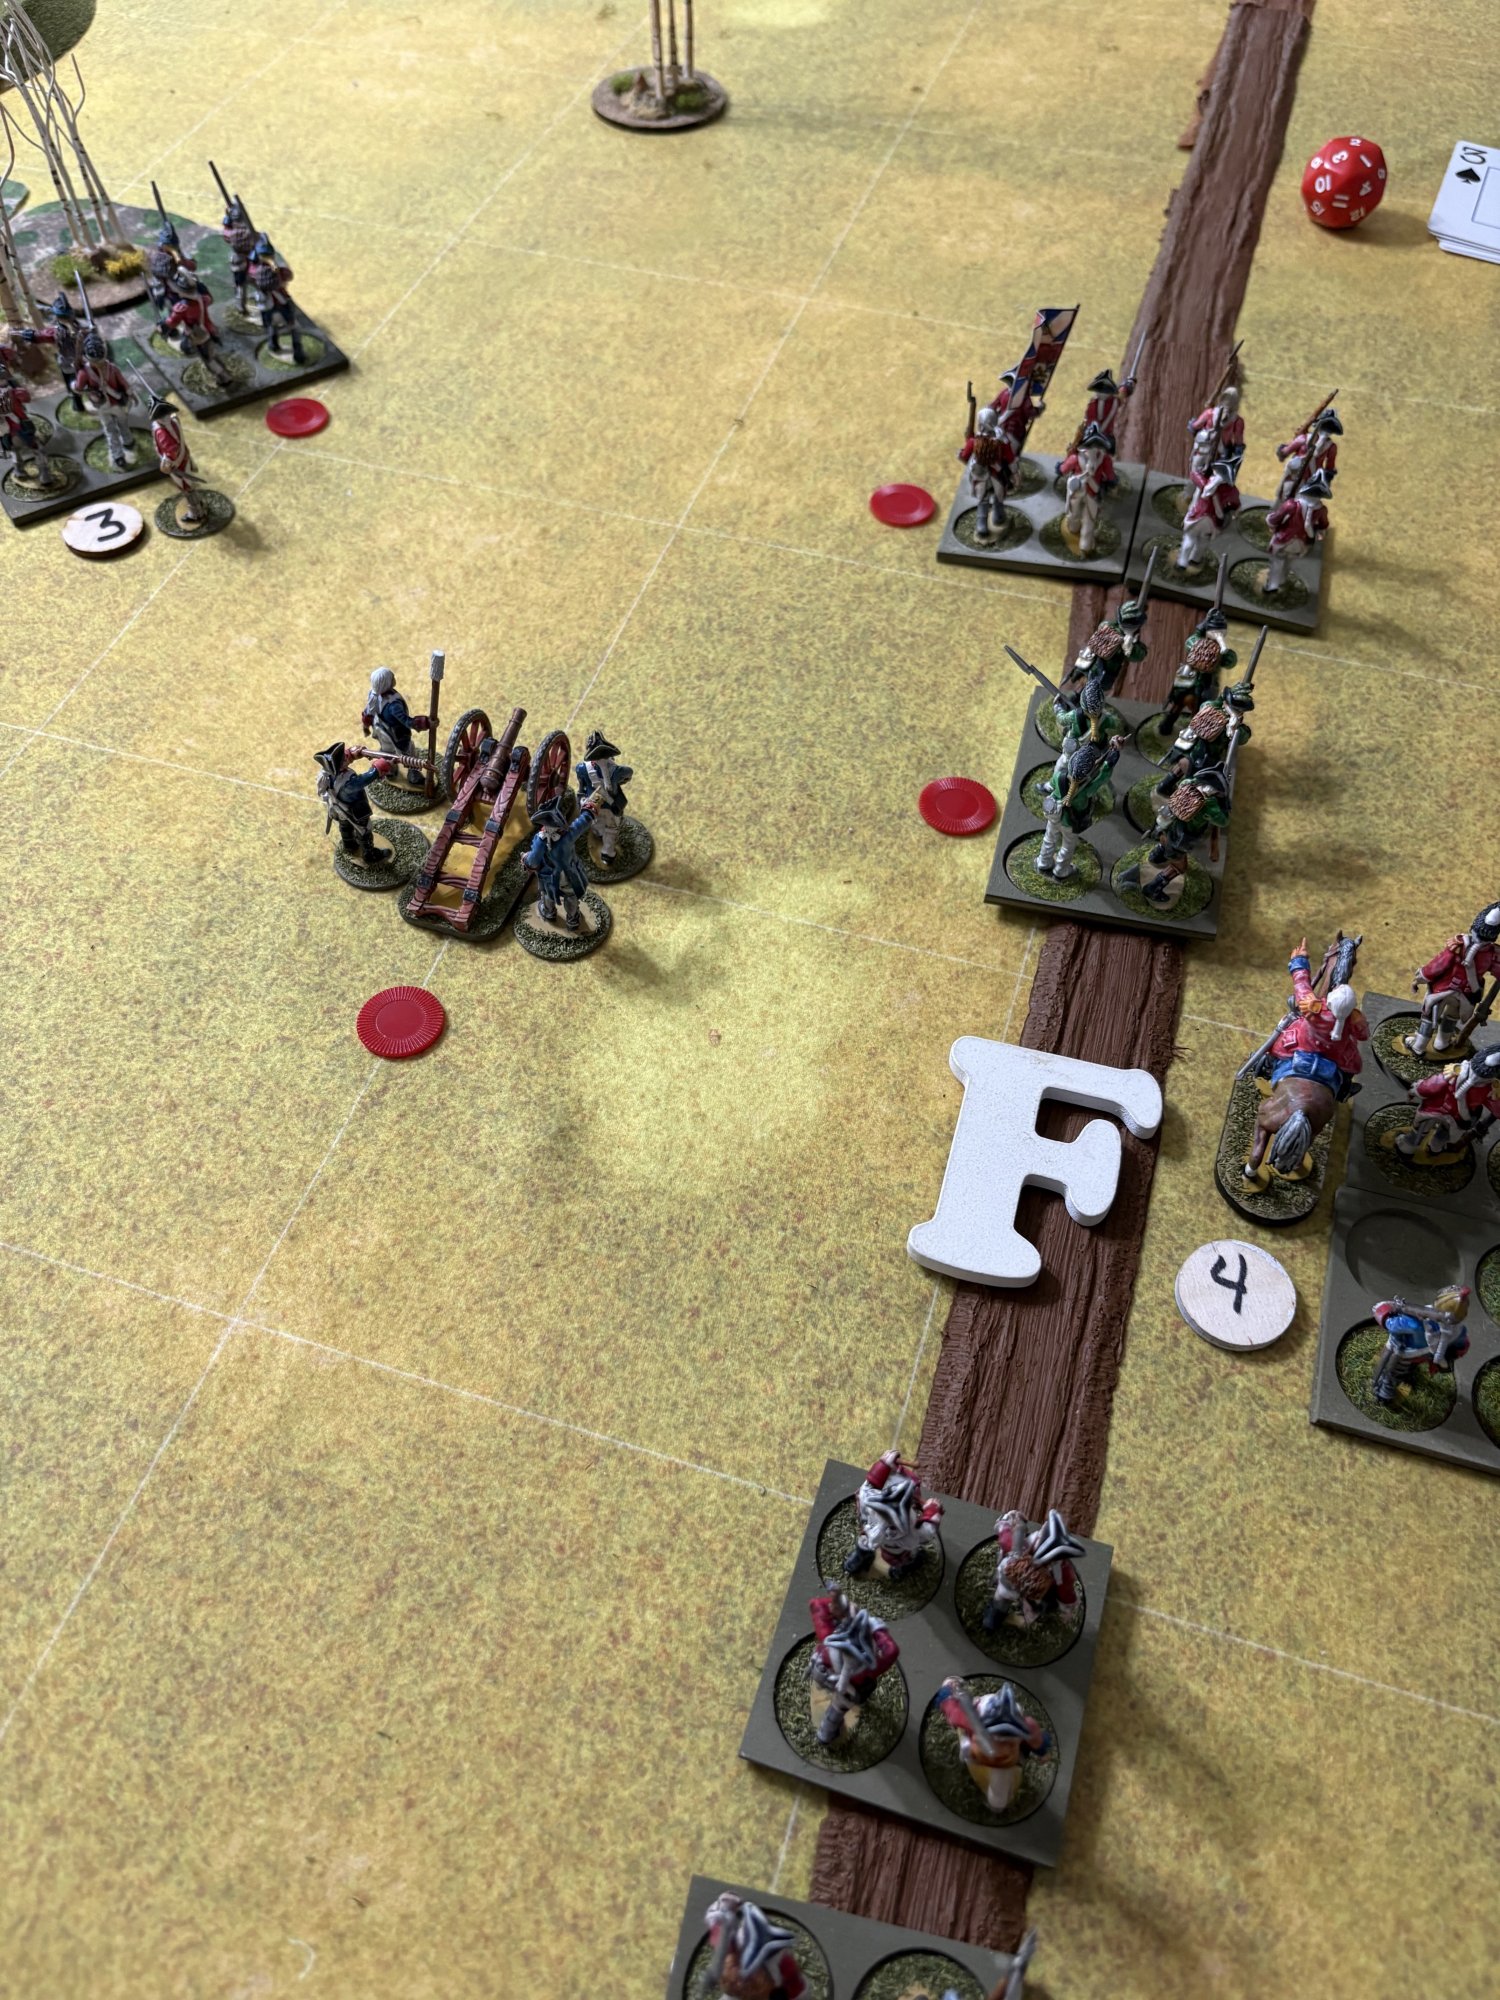
The Colonials take action on their turn and again Fire on the advancing British Column. Only one salvo this time but some damage was done. They did not do well with Command Cards this turn so are holding a few back. They are bracing themselves for the attack of the Light Infantry in the woods too. In this picture you can see the gun scored 1 hit and the second roll of the 1 failed with a 6. You can see the Lights entering the woods in the distance.
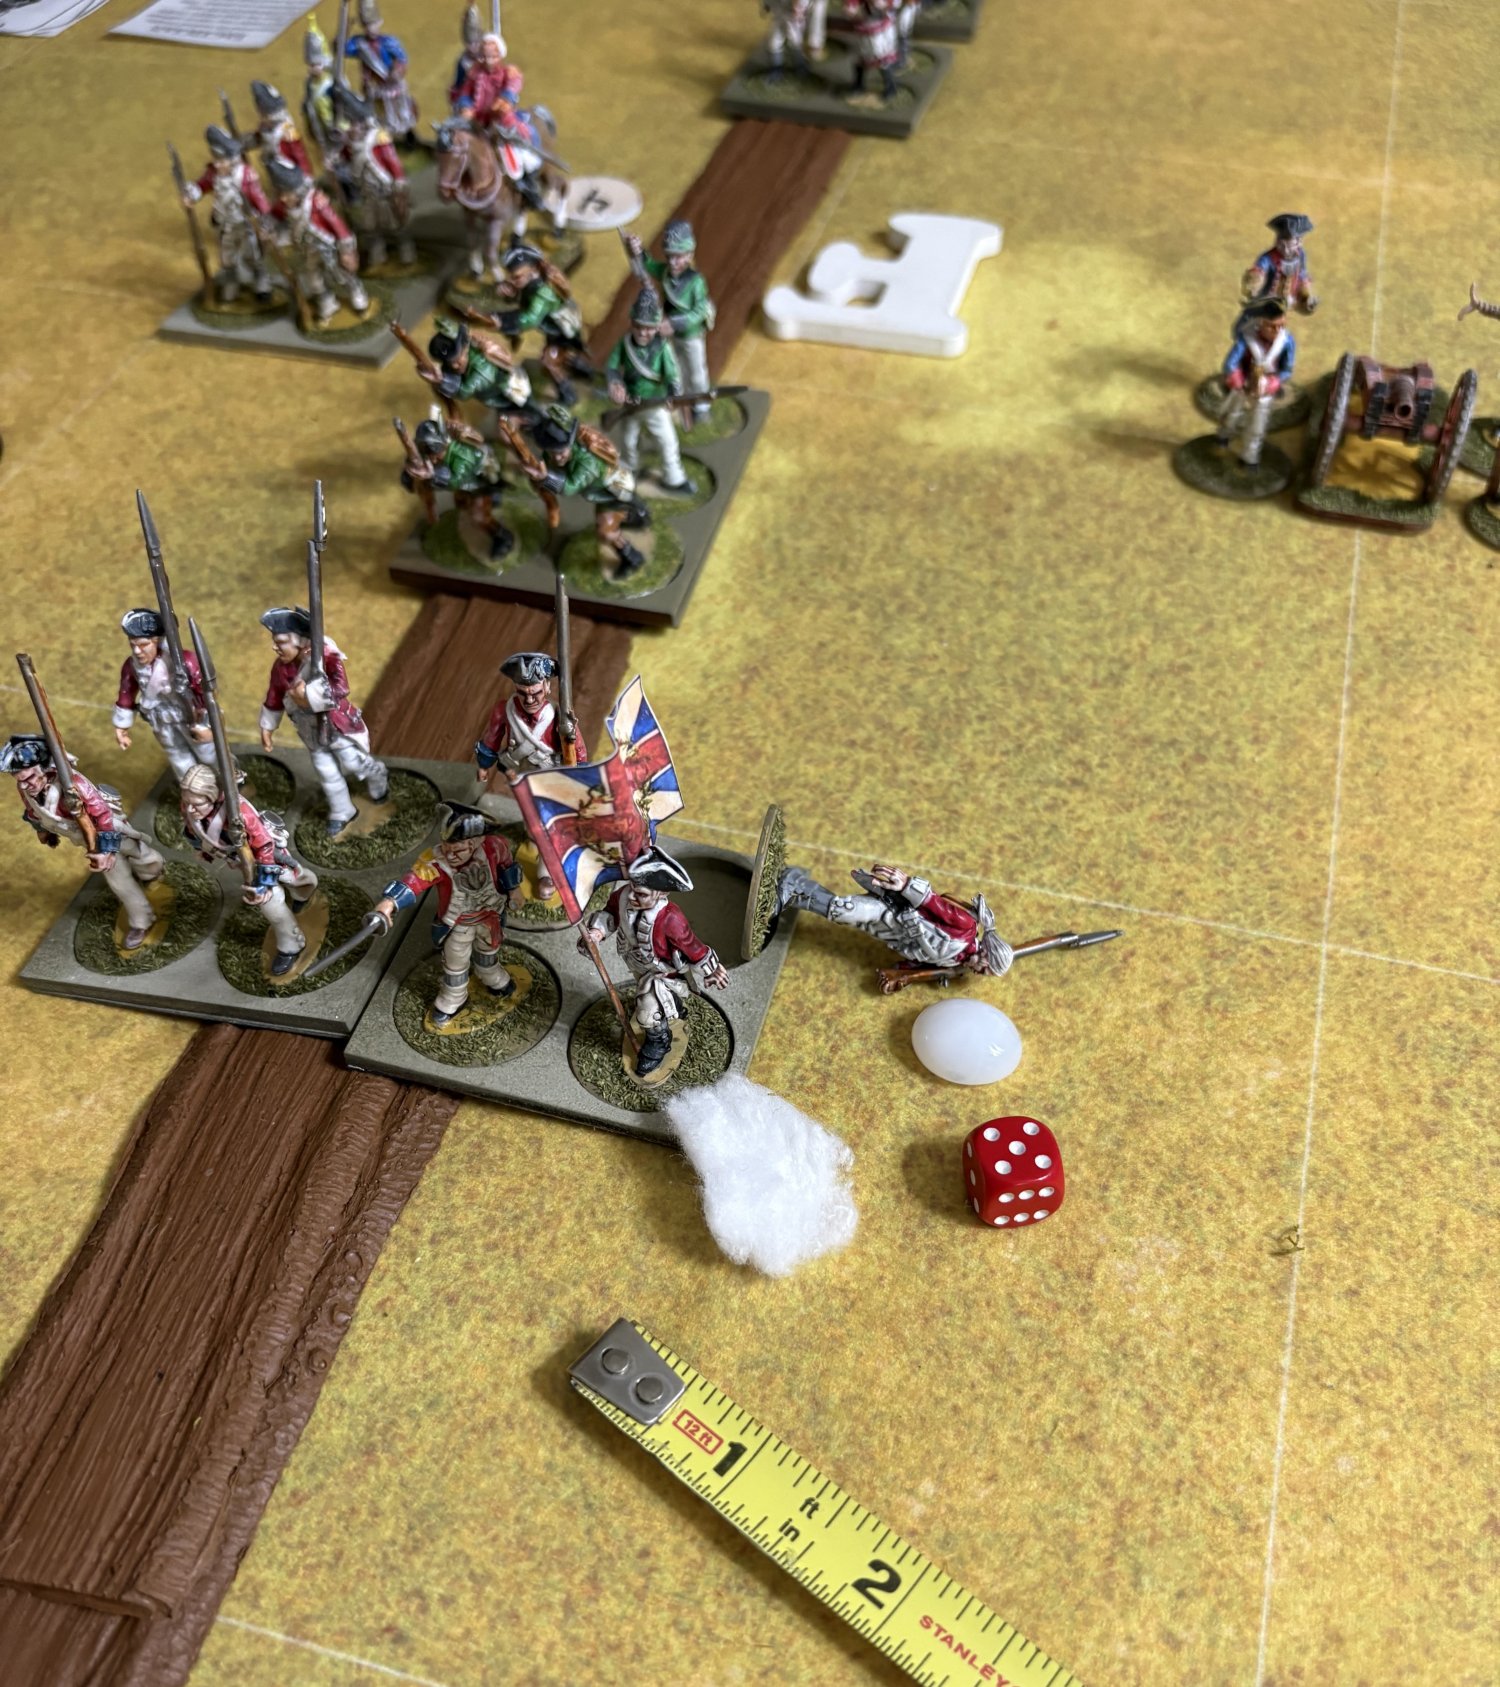
Here you see the British took 1 hit and make a saving throw. They needed a 1-2 but roll a 5. One figure down, and a Morale Marker on Smyth. This will trigger a Morale Check.
Smyth makes his Morale Check. He now has 6 Units on the battle field and none of them are Spent. He needs a 16 or better and only has a -1 modifier. The British roll 25 and pass with ease.
Turn 4 — The Fight for the Hill
Beginning of Turn 4 and the Colonials win this time and they take first move.
Speeding ahead now during turn 4 we see that the Lights and Riflemen are locked in Combat in the woods with the Rifles getting the better of things. This may be due to the Continentals firing on the flank of the Lights though.
The Colonial gun is still firing at the British who are now in line and less likely to take casualties at long range. The British gun is in action and firing on the Continental Infantry and have caused a casualty too. The big change is that the Continental Infantry have advanced into close musket range (6″) and are firing at the Lights in the woods.
The important development is that Lt. Colonel Smyth has played an Ace, worth three Commands, taken charge of two Units, and force-marched them across the front of the Colonial-held hill. He has abandoned the bulk of the Regiment and formed these 2 units into the Battle Line.
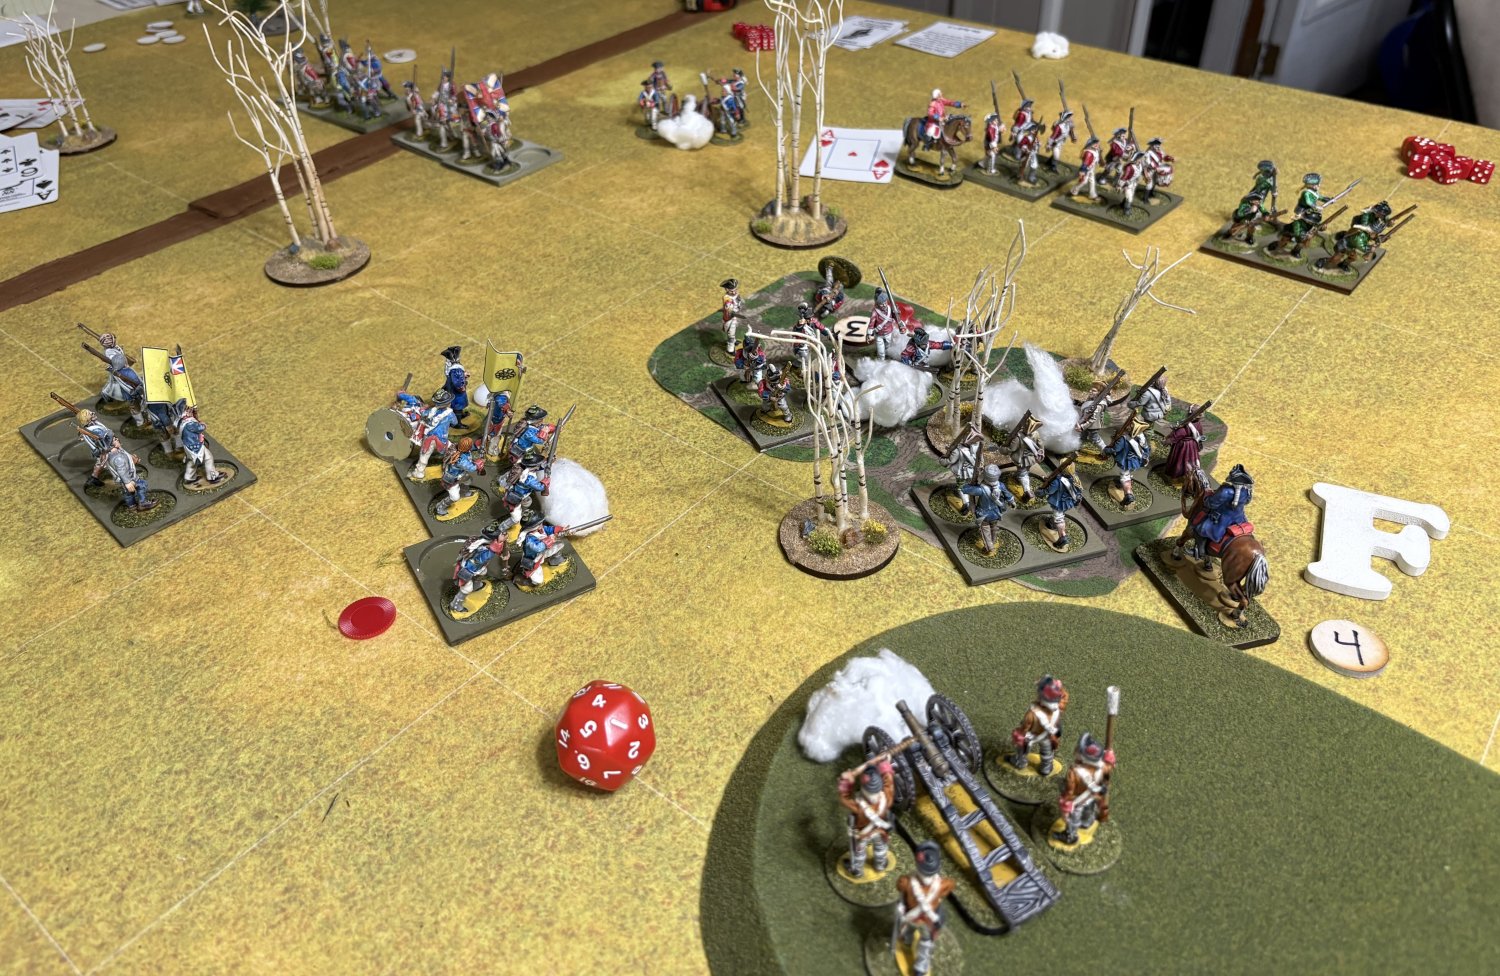
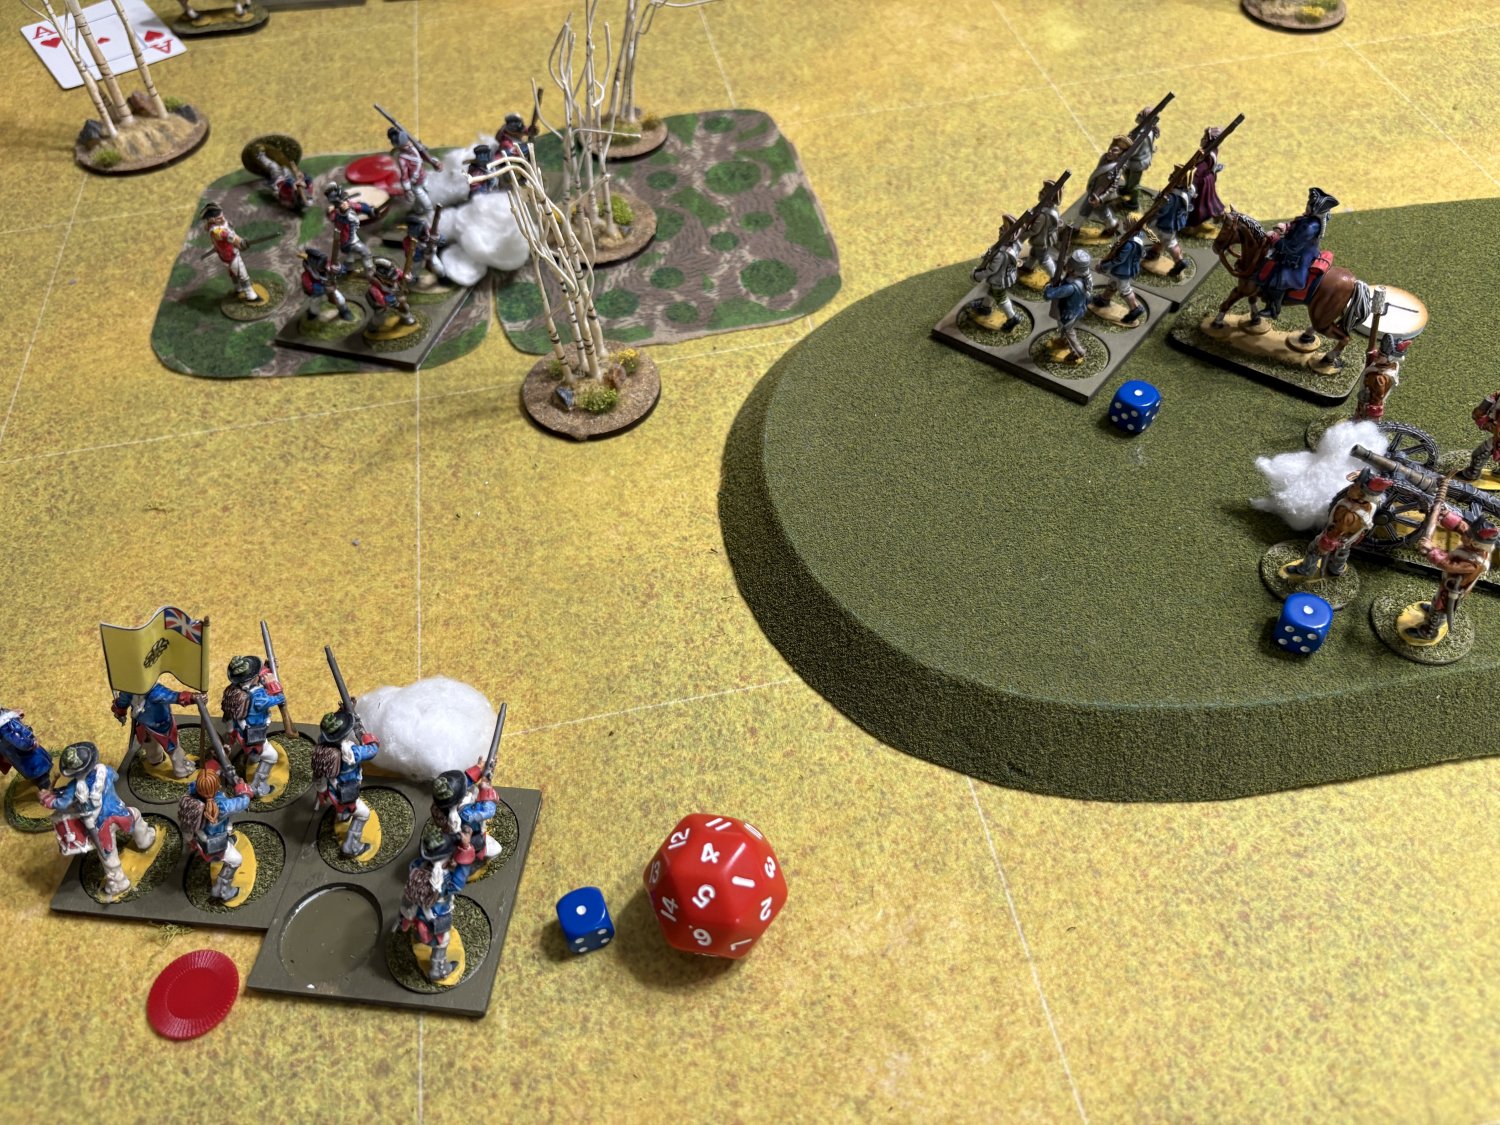
At the end of the turn the Colonials must take a Morale Check because the Continentals lost a figure to British Artillery Fire. The Morale Check fails by 3. The blue dice indicate which units fell back 3″. This pulled the Rifles out of the woods and the gun back as well (probably a good thing next turn).
Turn 5 — Death on the Hill
The Colonials win First Move and take it.
The Colonials roll for their cards and do well. One of their cards is an Ace which is 3 Command Points on a single Unit. They advance and pivot the gun and fire at the advancing British who had managed to end the last turn in line facing them. However even at close range which needs a 1-2 to hit the guns missed. This now adds more DIS on the gun and it is Spent. The Infantry fired back and caused one hit which was not saved by the gun crew.
Next the Rifles are ordered to fire. They fire first and score 2 hits at close range. The British return fire has no effect and they try 2 saves and fail each one.
Their Colonial Commander plays a Staff card to remove 1 DIS from each Unit.
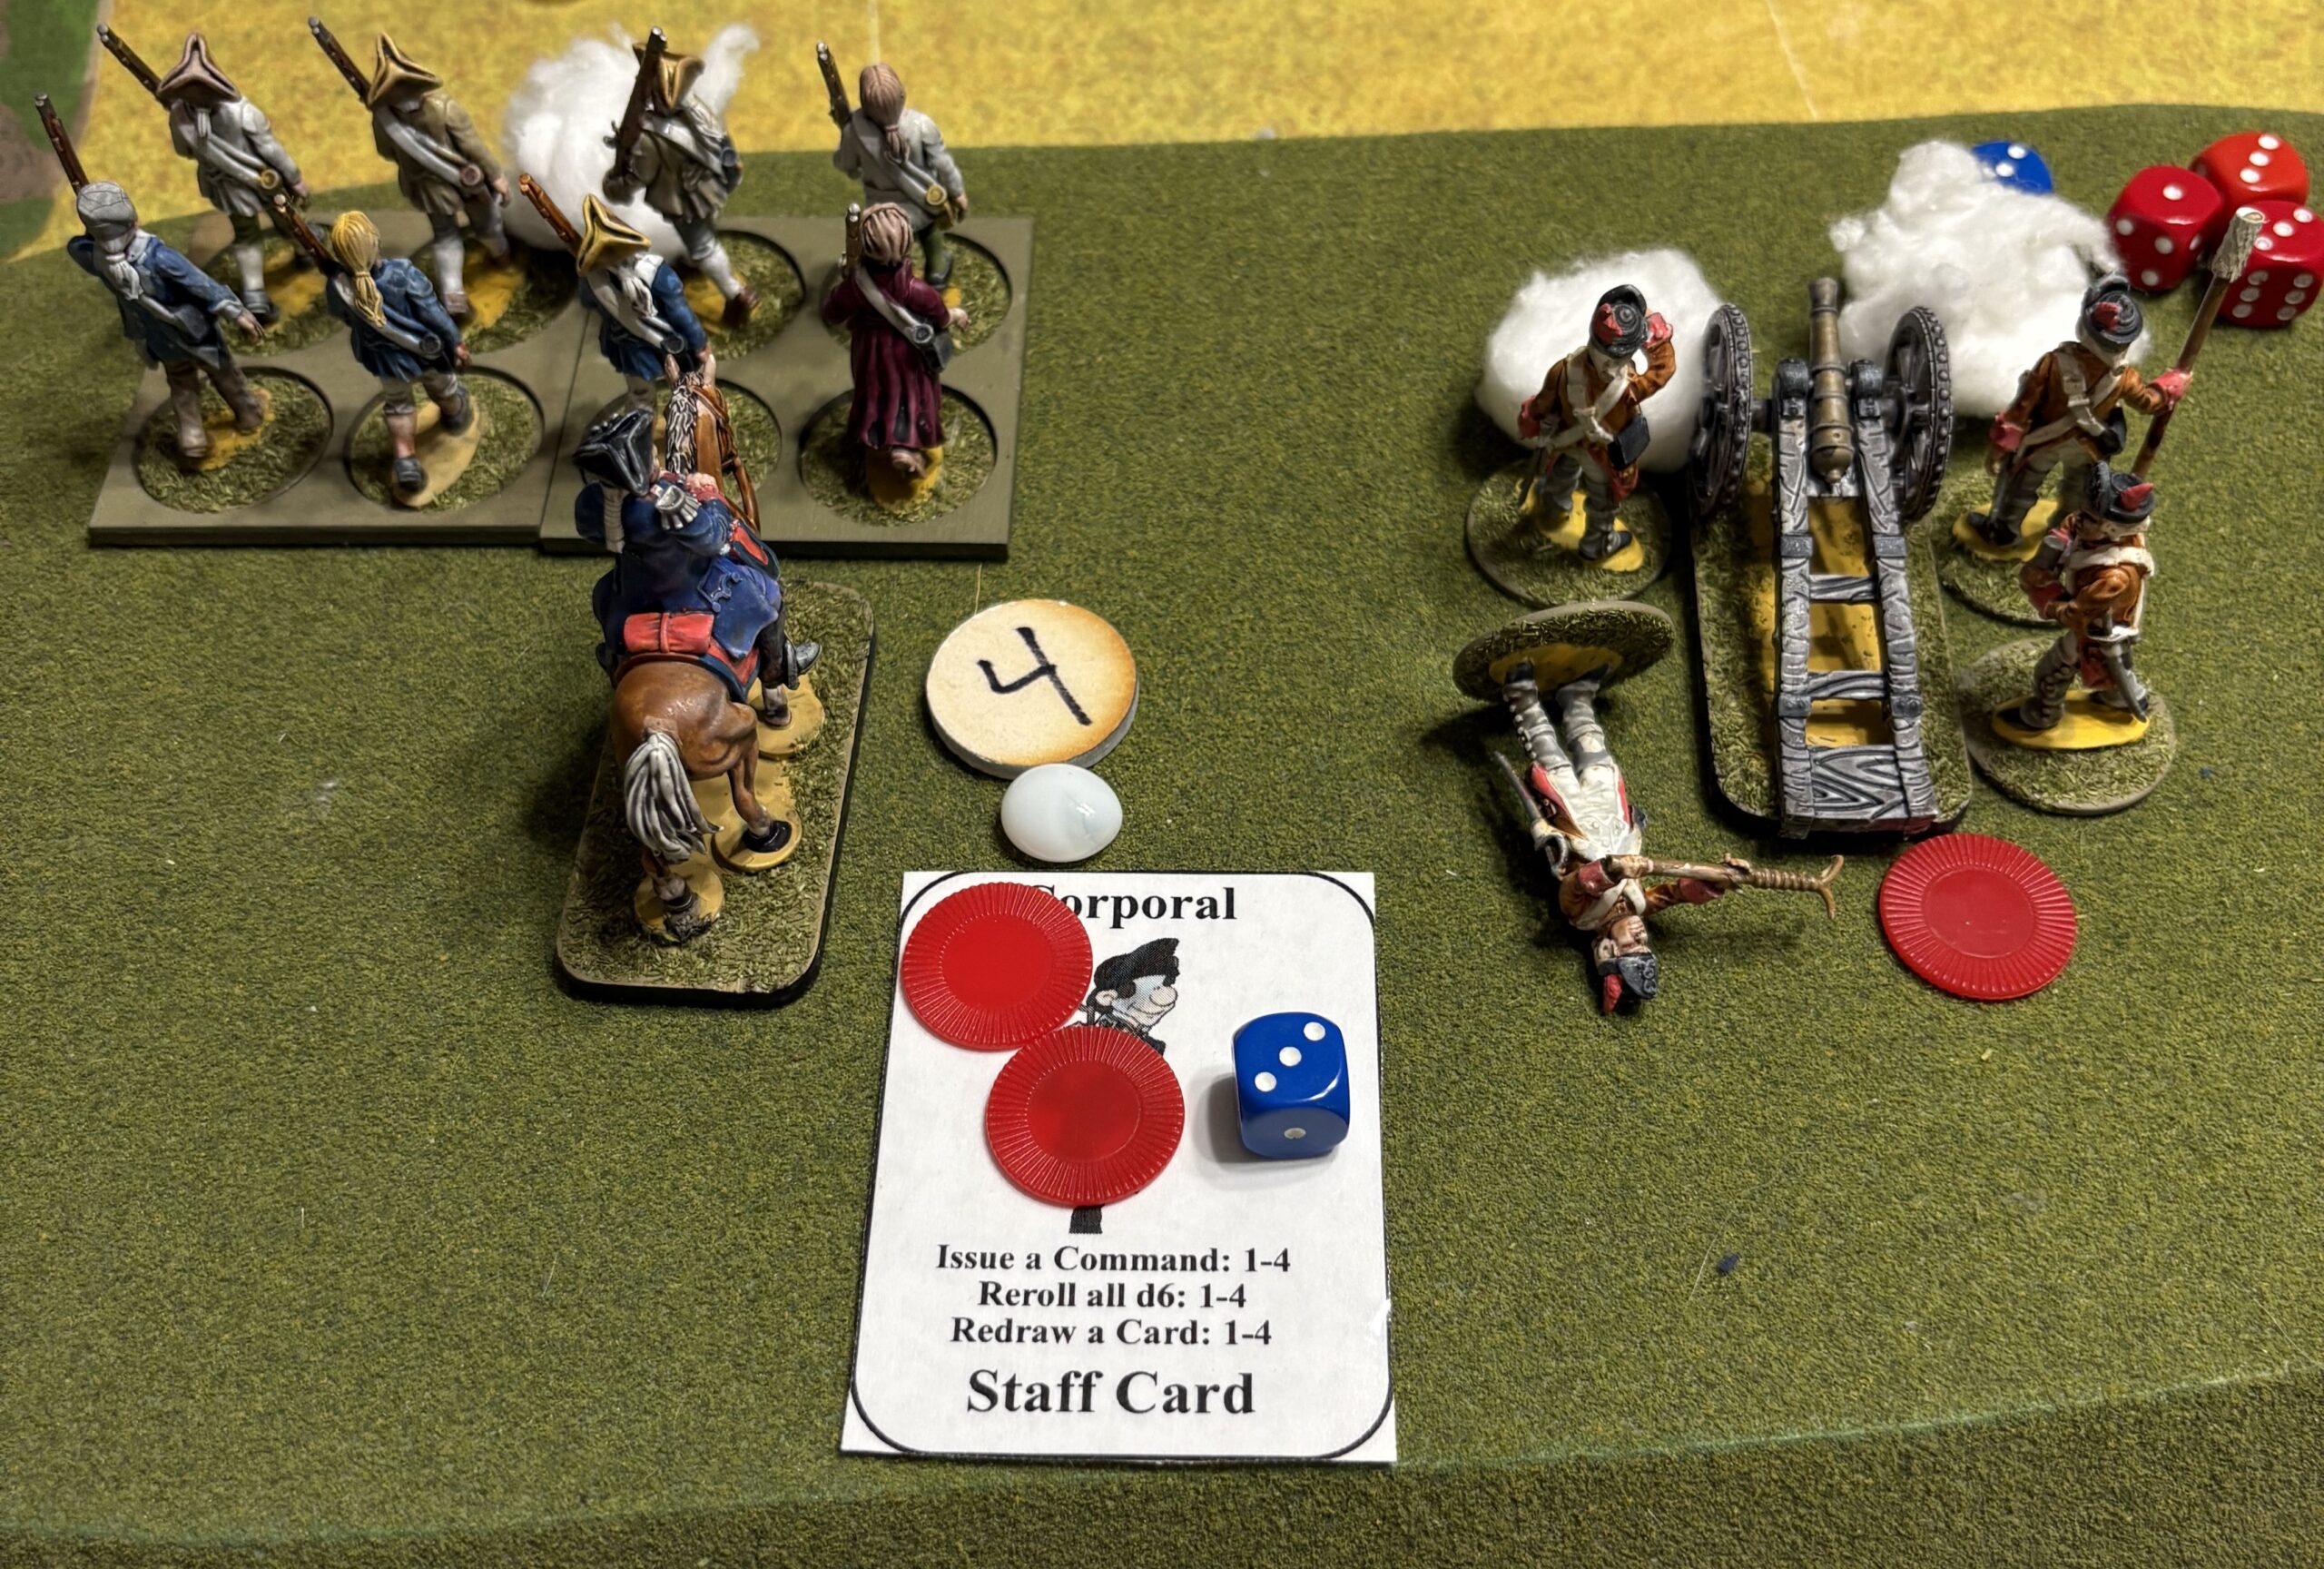
Both sides take Morale checks. The Colonials fail by 3 and the gunners abandon their gun, they rout from the field. The Continentals and remaining two Militia also fall back a 3″ move.
Turn 6 — The Final Charge
First Move Determination for Turn 6 results in the British winning and taking first move.
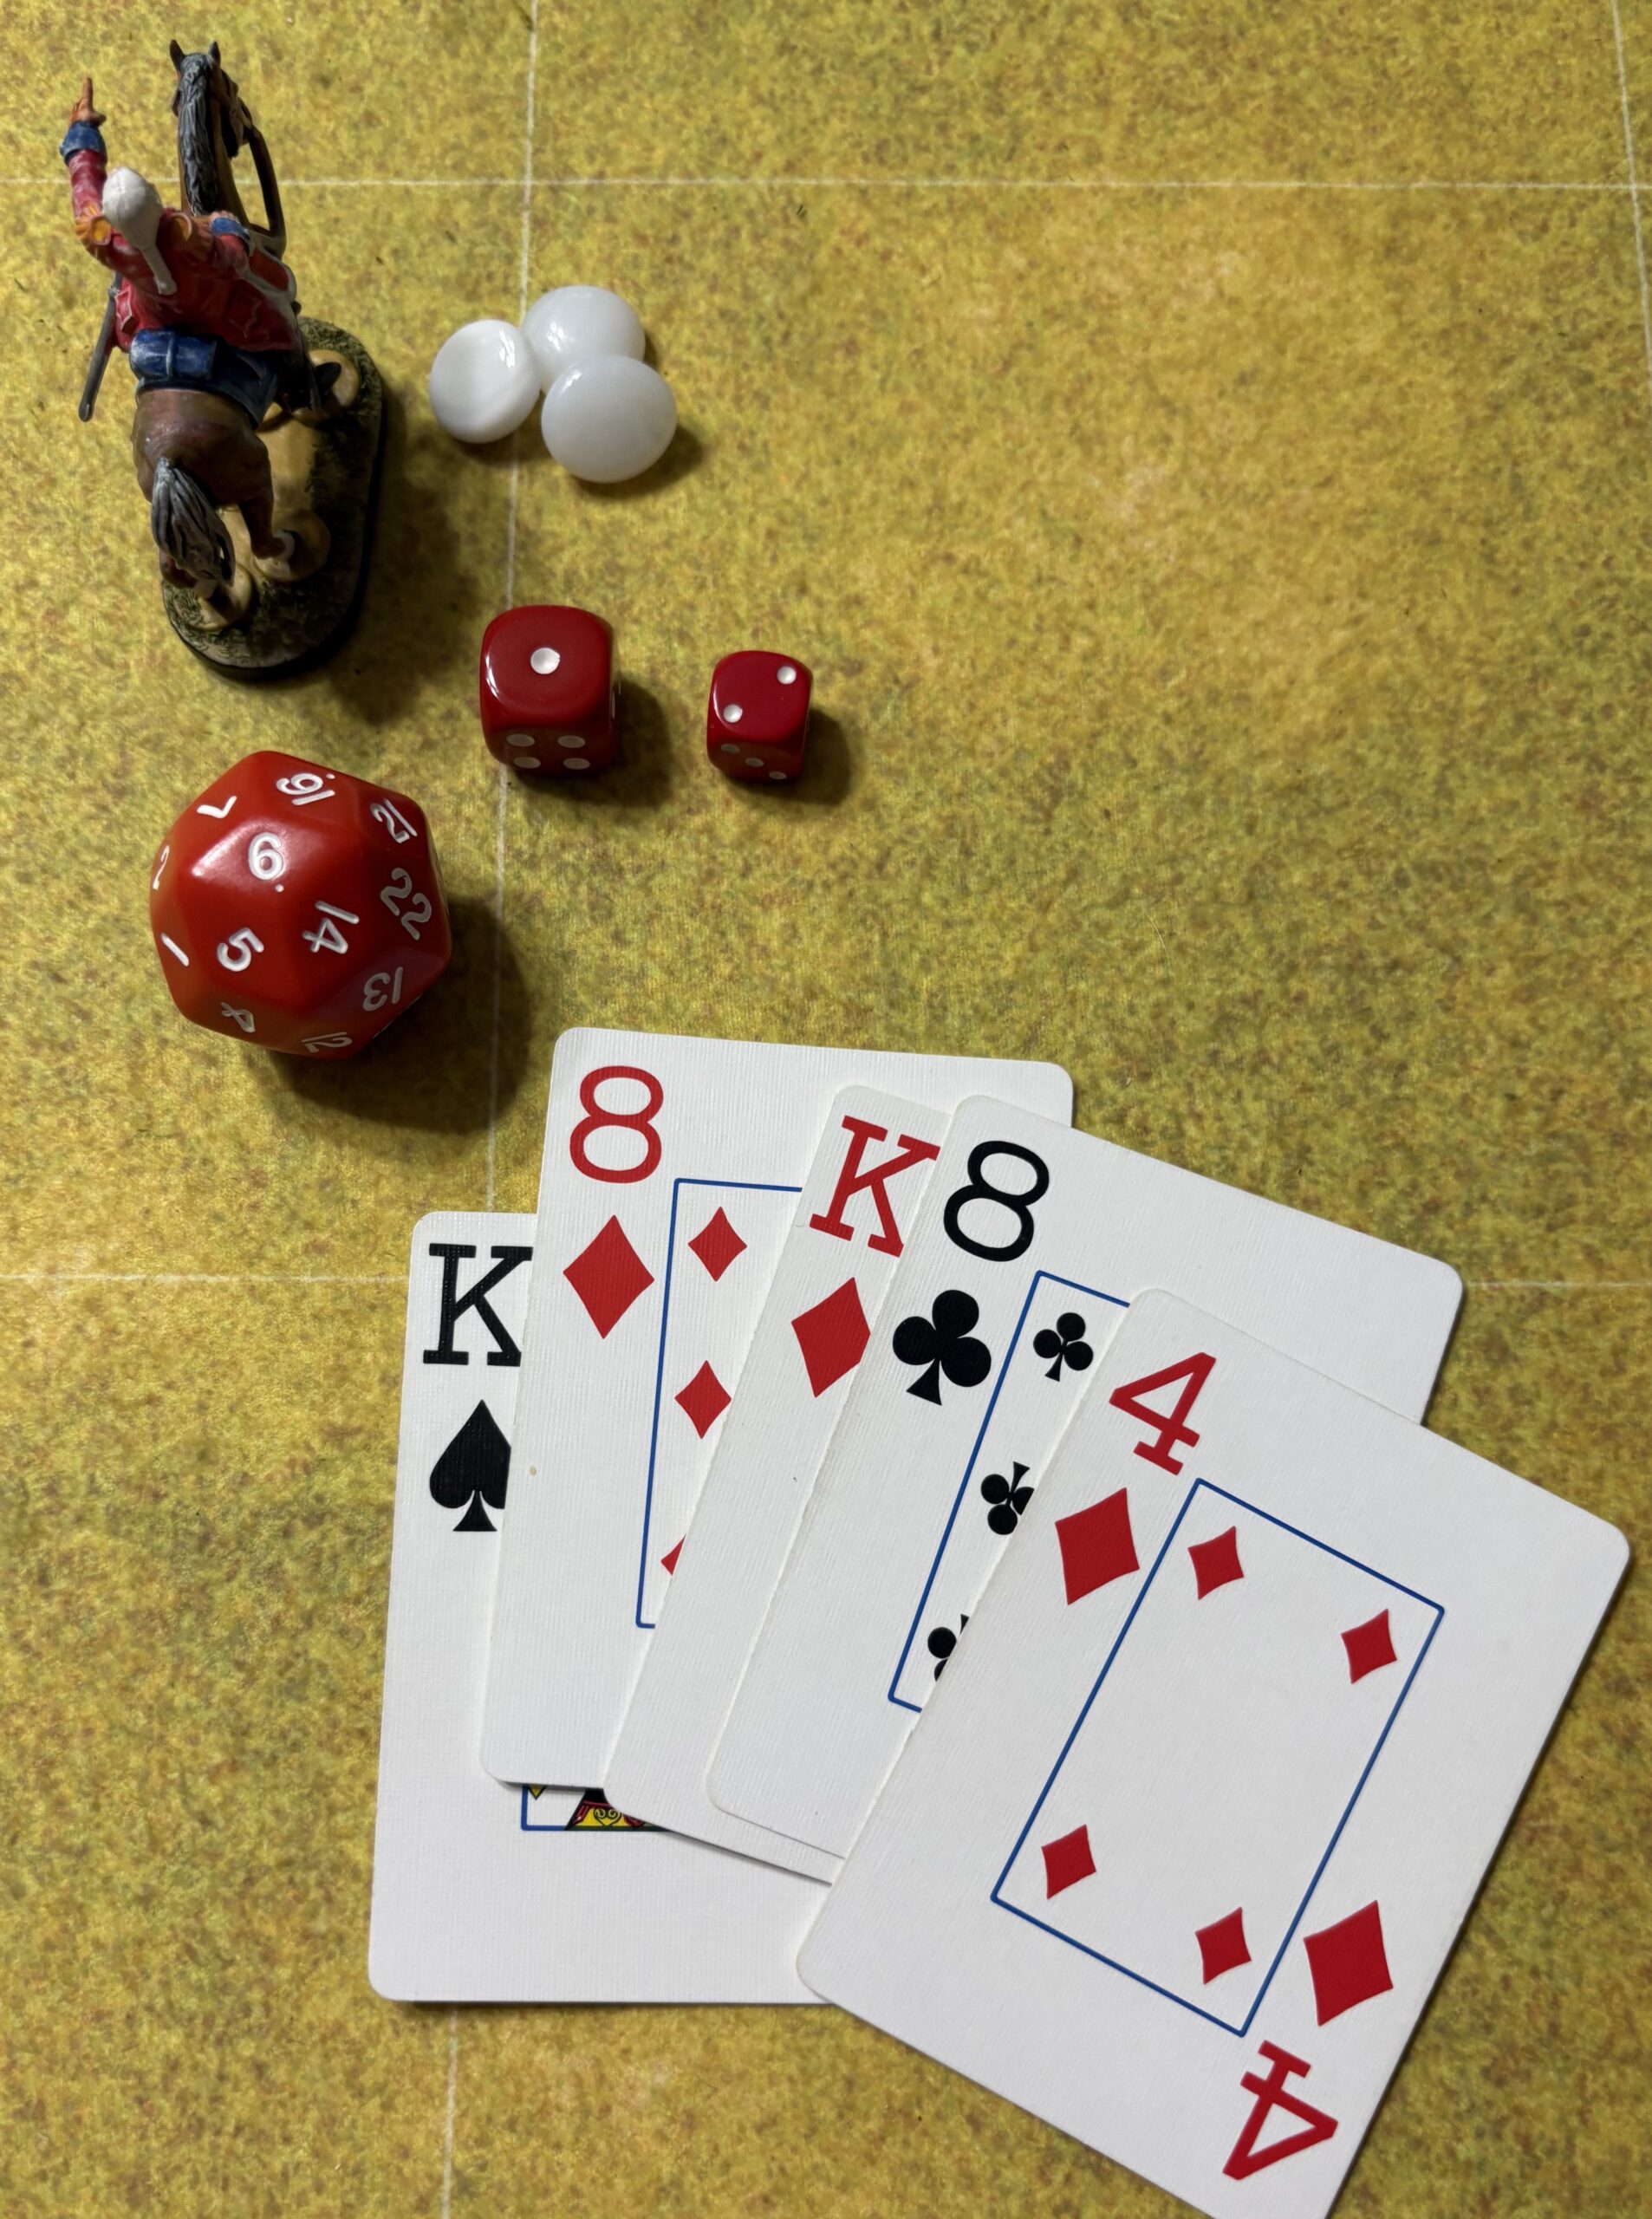
Lt. Colonel Smyth rolls a 1 which gives him all 4 cards. As it is a 1 it is rerolled, he needs a 1-4 to gain another card. He rolls a 2 which gains him a 5th card but ends the open-ended 1. This is the only way a Commander may hold more cards that his Military Rank.
He plays a King and charges. You need a 2 point or higher Command Card to charge formed troops in the open. Next both sides check to see if the Militia may fight back in the Melee. They can because it is both Melee Combat and a Commander is attached. Finally, both Units roll to see if one of them goes first “Who Goes First”. The number is based on the Training Level of the Units. The Militia need a 1 while the British need a 3 or less. Both have a Leader attached which are canceled out. The British have 1 DIS which makes their 2 a 3 but they still win and will go first.
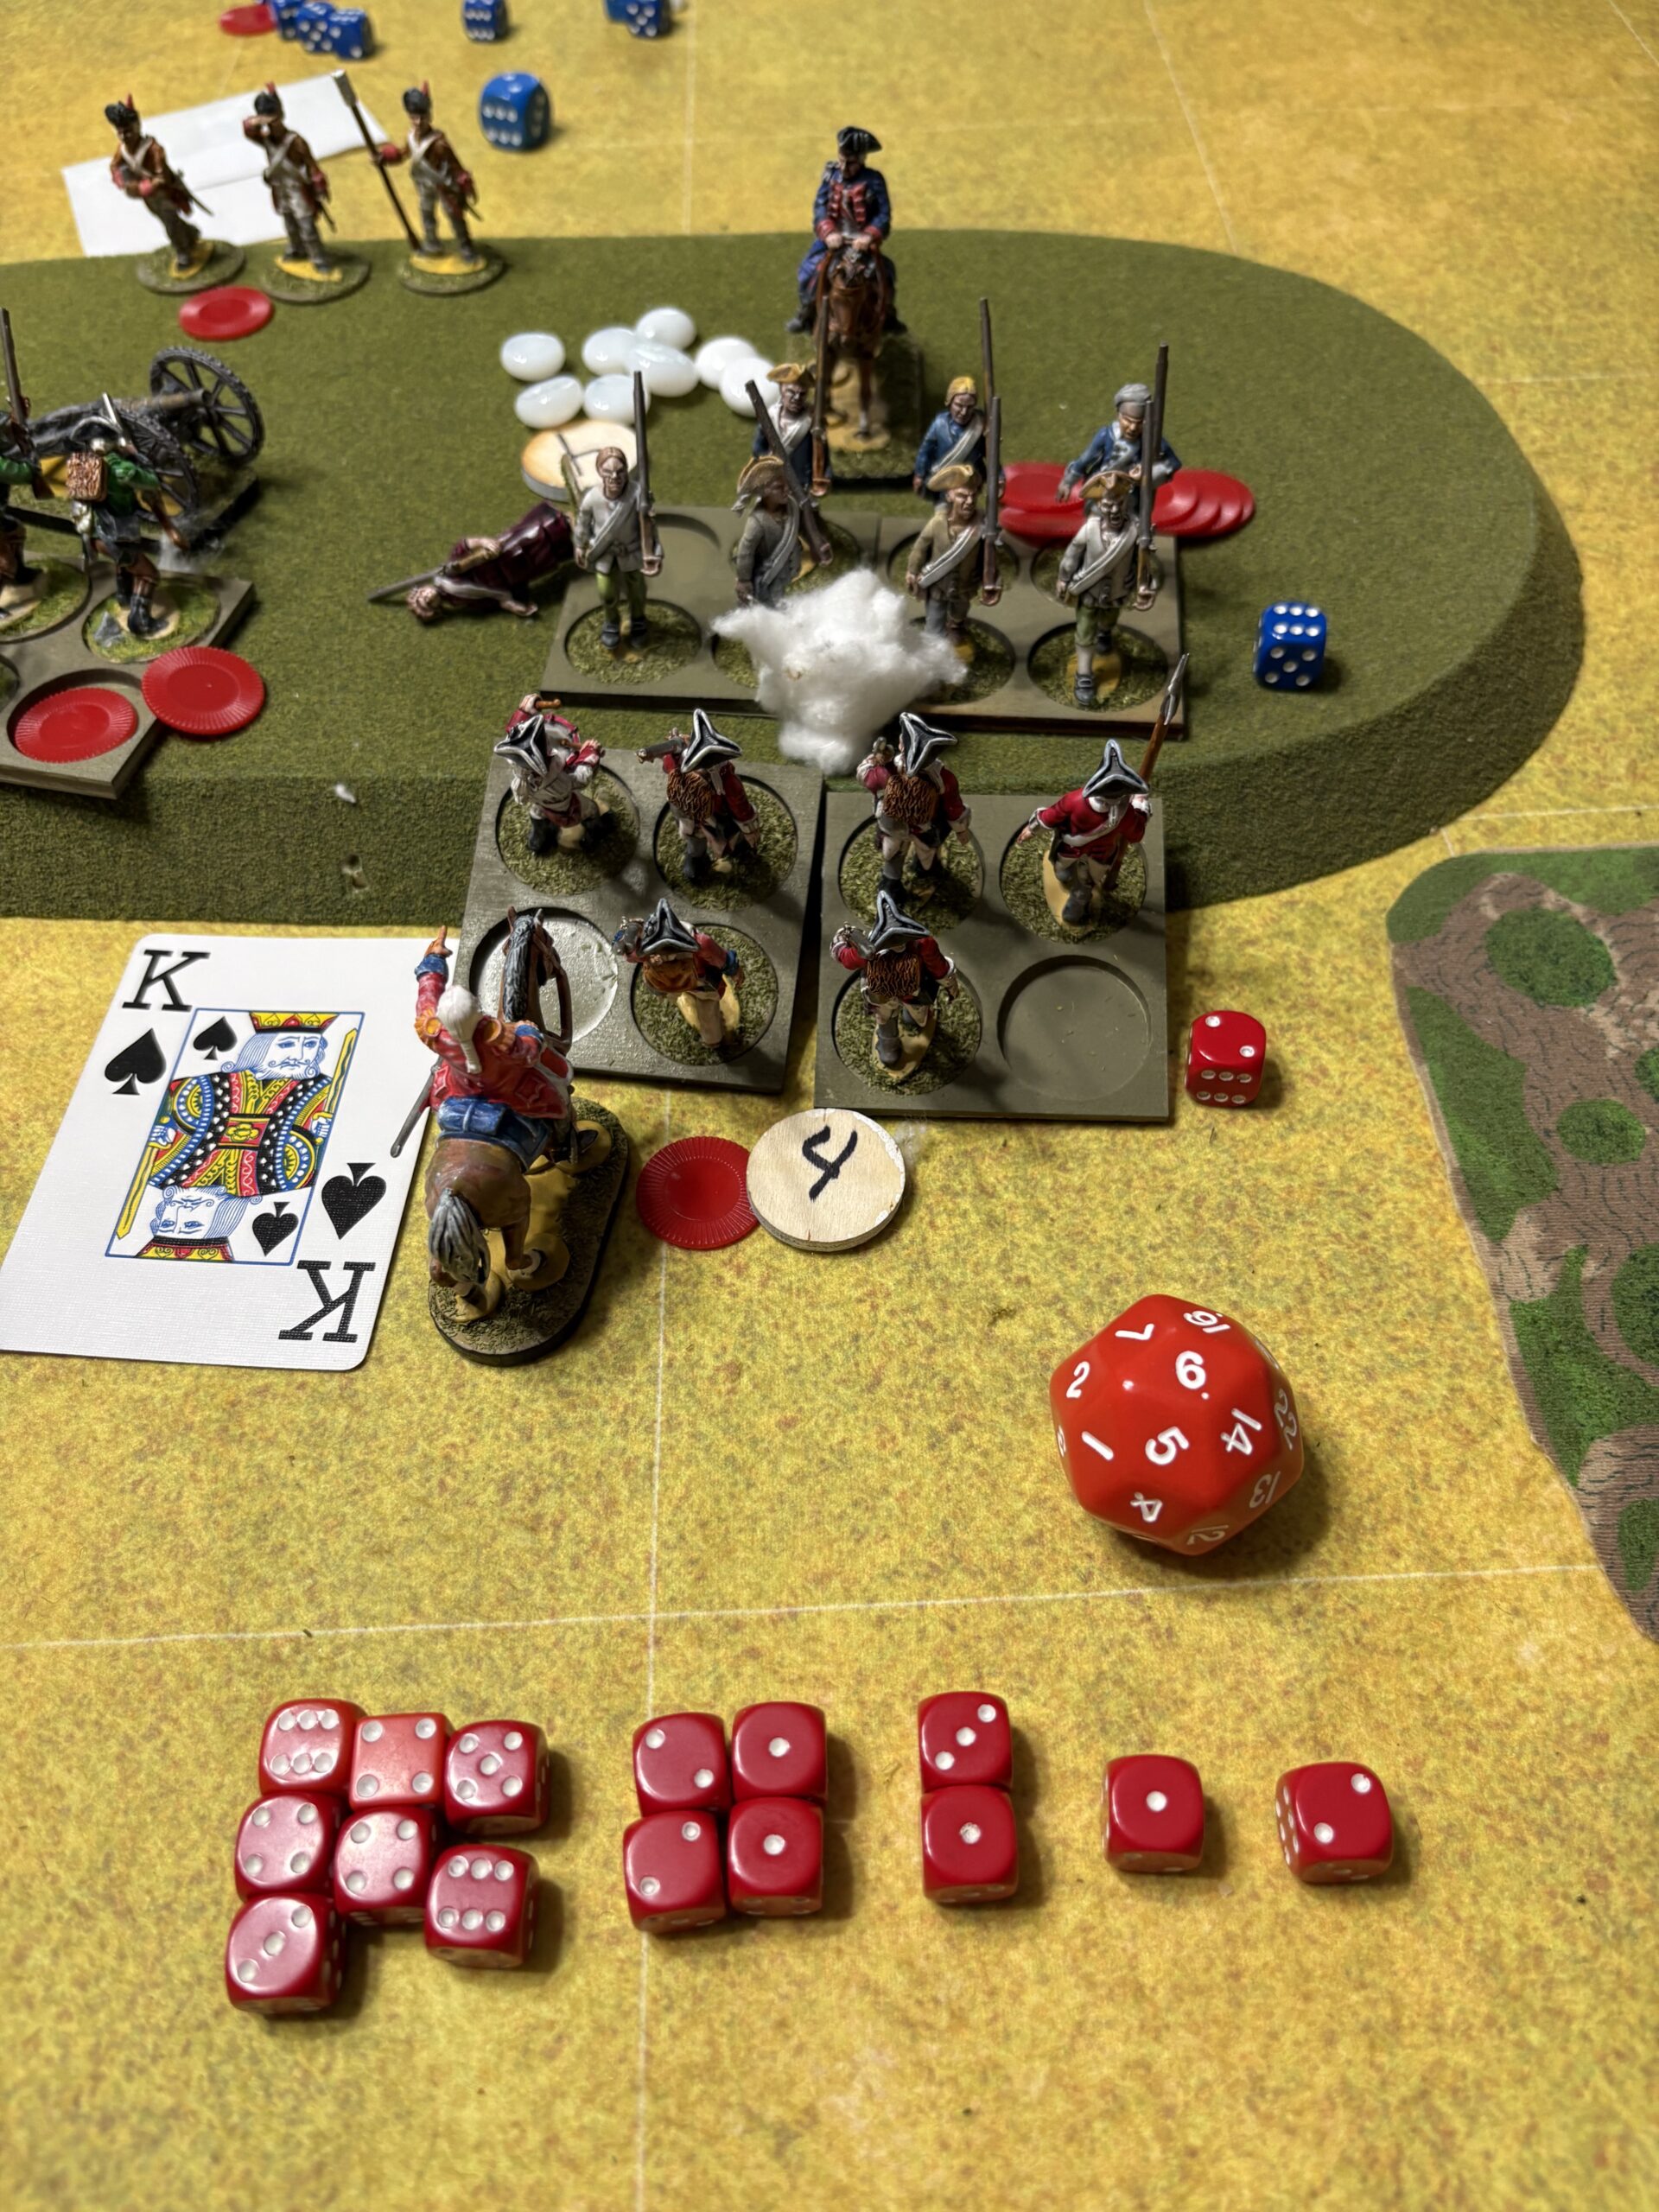
Because the British are Disordered, they roll one die for every three figures, giving them two base dice. They add one die for their Officer, two dice because they are facing Training Level D troops, three dice for their First Melee bonus, and three dice for using bayonets against Militia. The British therefore roll eleven dice and score hits on rolls of 1–2.
The British score four hits on their initial roll, including two 1s. Both 1s are rolled again and each scores another hit. One of those rerolls is another 1, so it is rolled once more and scores a final hit with a 2. The British therefore inflict seven hits altogether.
The Militia make a save and fail. They take one figure lost and the rest as DIS. They add 7 Morale markers. As they are now Spent they cannot defend themselves in Melee and the turn moves on to the Morale Check Phase.
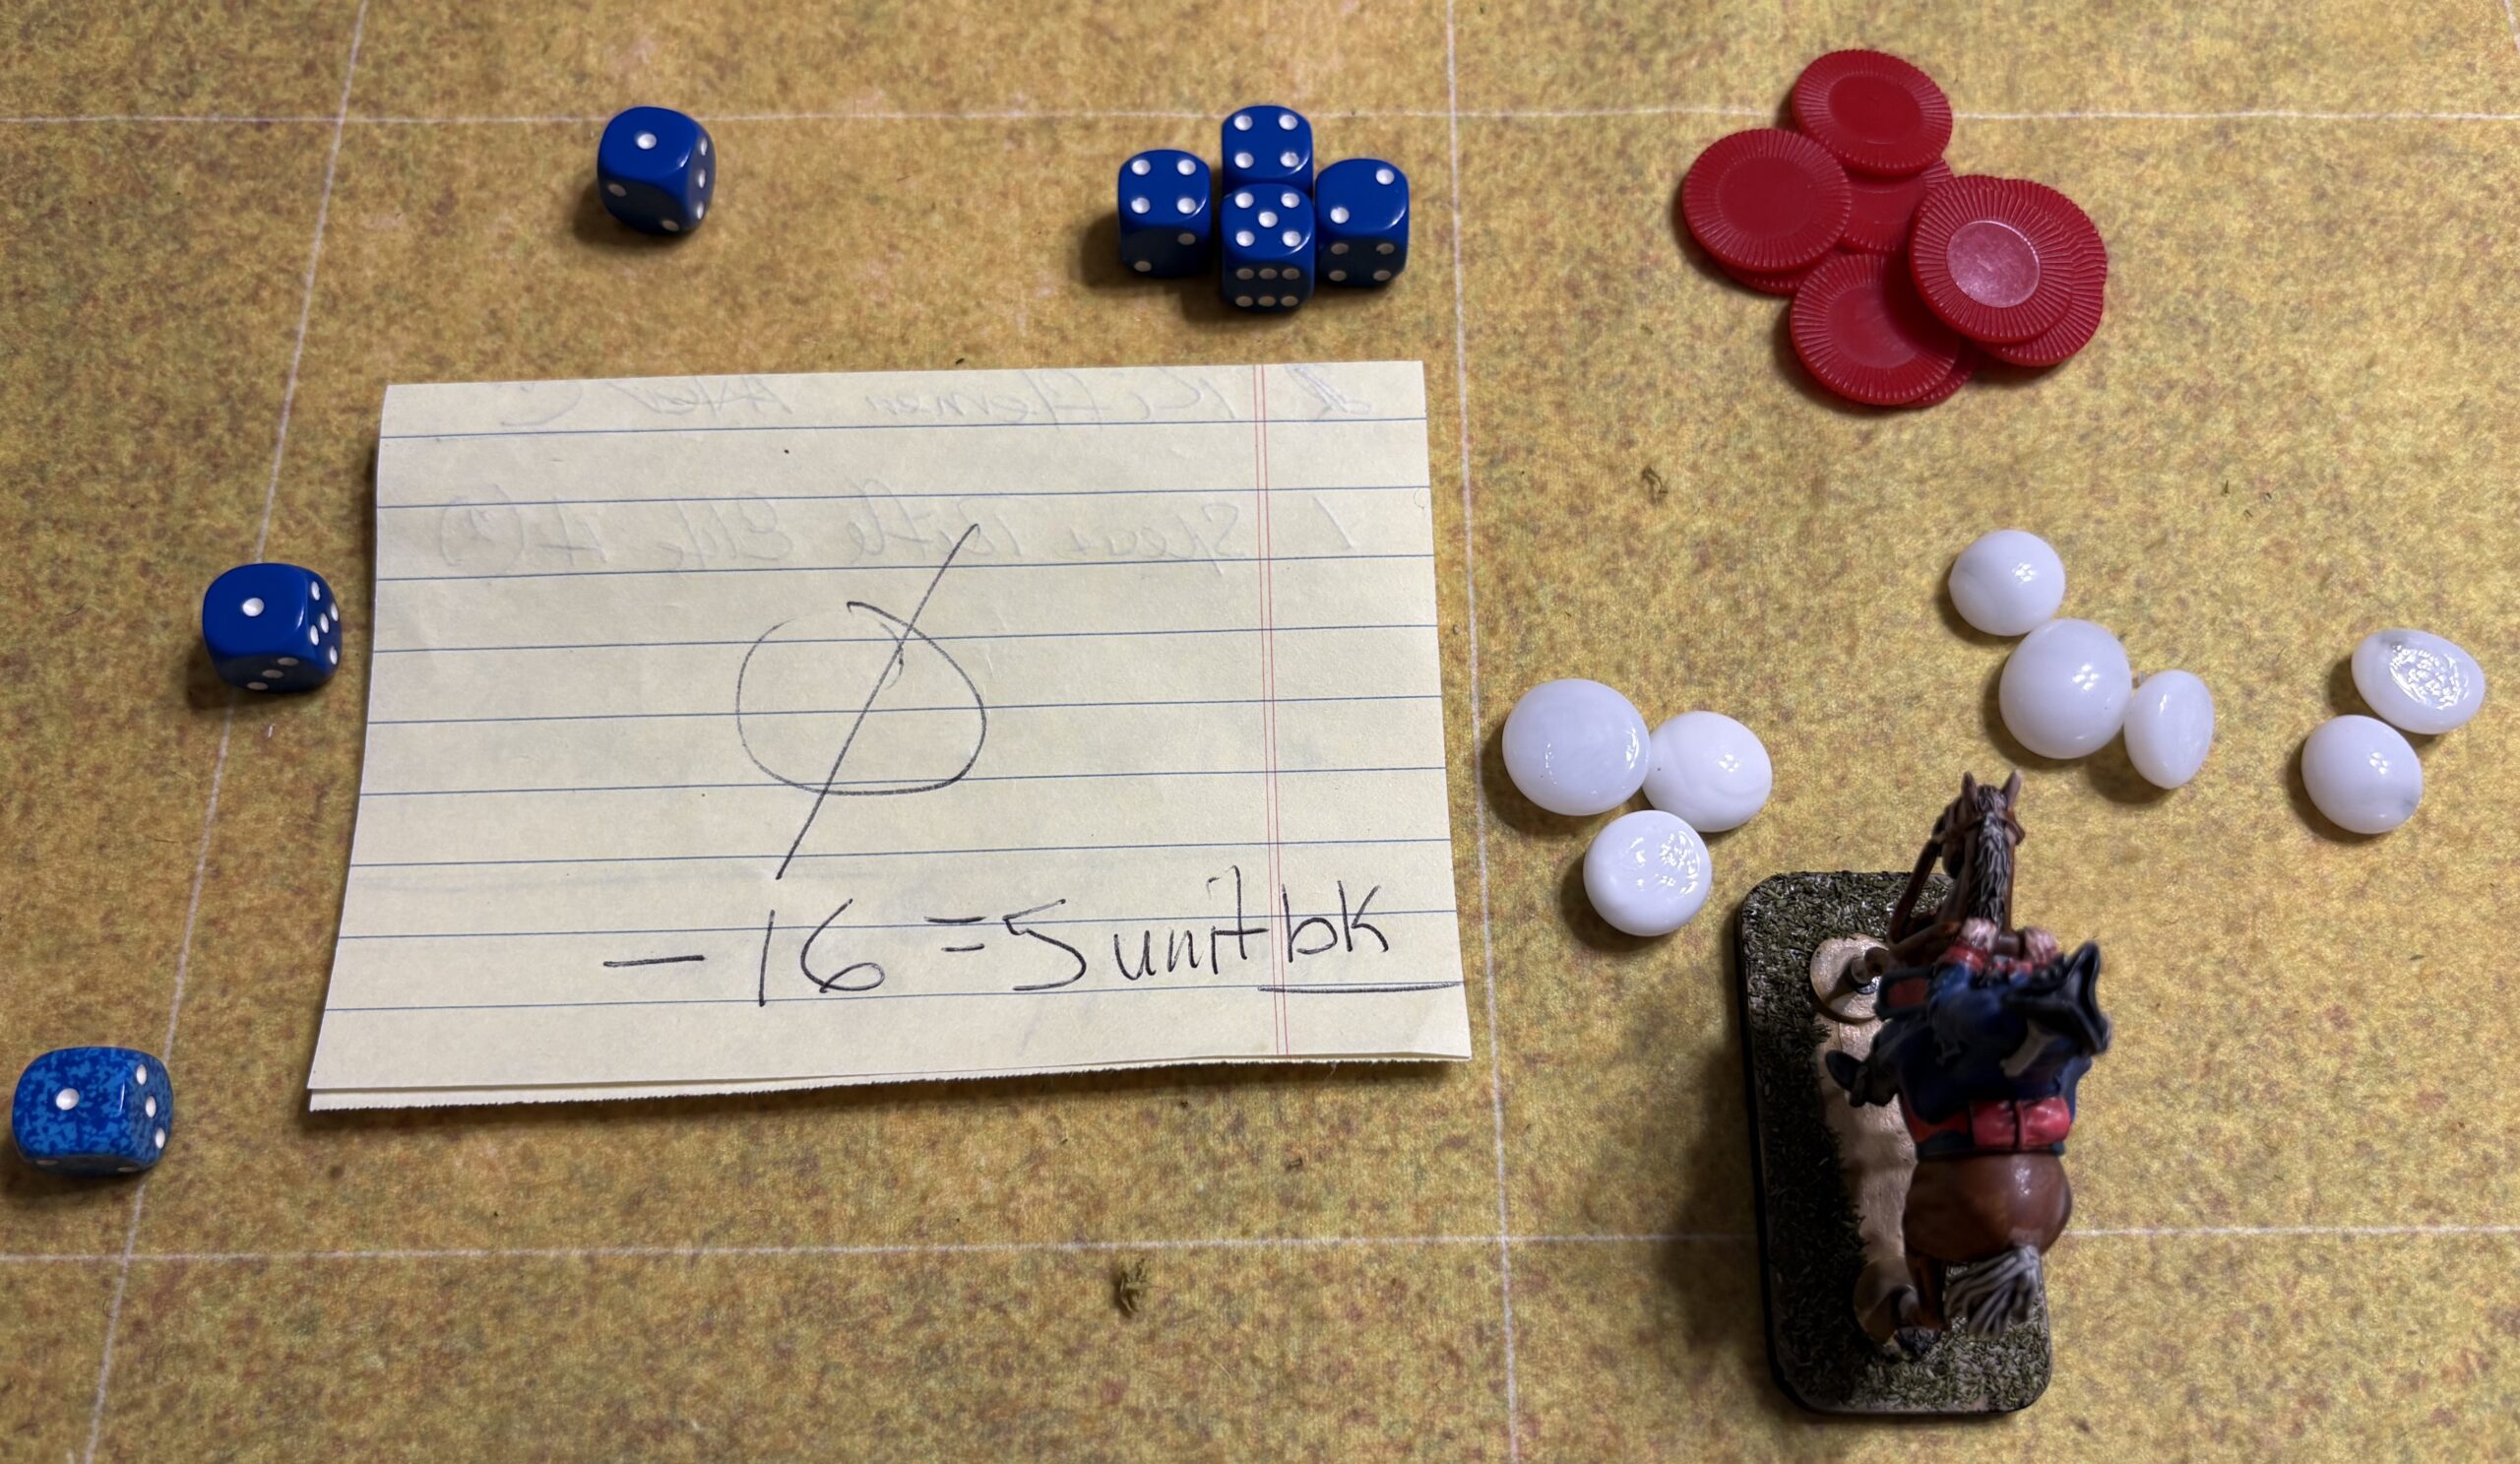
The Colonials have 4 Units able to roll dice. The Militia on the hill cannot roll as they are Spent. The Colonials roll a 15 which is -1 already. Let’s add up the rest of the negatives. -3 for 9 Morale Markers, -9 for DIS and finally -3 (blue dice) for 3 Units out of the Battle Line. -16 total from 16 is 0. Each of the 5 Units takes 3 Outcome Moves which Breaks them and they all leave the field. The battle is a British Victory.
After the Battle
Before long, the sound of drums and marching feet announced the arrival of General Clinton’s flanking force along the Jamaica Road. The crossroads had been secured, the hill was in British hands, and Lt. Colonel Smyth had accomplished his mission. His Regiment had endured a disastrous opening bombardment, reorganized under fire, and recovered sufficiently to drive the Colonial defenders from the field.
Once the Battle of Long Island ended, Smyth was summoned to headquarters. Victory, however, did not guarantee advancement. To be promoted he needed to draw a card higher than his current Military Rank of 4. His draw was unsuccessful, so he remained a Lt. Colonel.
Smyth then rolled to see whether the experience of the campaign had earned him another Trait. His roll of 7 produced no result. There would be no promotion and no new ability after this battle.
Still, the crossroads had been taken, the hill secured, and Smyth and Lieutenant Royce remained together at the head of the 250th Regiment.
No promotion. No new Trait. Only new orders—and another march toward the enemy and hopefully another Lieutenant to help with the commanding of his 6 Units.